How To Export IMovie To MP4: The Ultimate Guide For Video Enthusiasts
Are you stuck trying to figure out how to export your iMovie project as an MP4 file? Don’t worry; you’re not alone. Many users find themselves scratching their heads when it comes to exporting their videos in the right format. Whether you’re a beginner or a seasoned video editor, mastering the art of exporting iMovie projects to MP4 is a game-changer. Let’s dive into the nitty-gritty and make sure you’re equipped with all the knowledge you need.
Exporting videos from iMovie might seem like a simple task, but trust me, there’s more to it than meets the eye. With so many options available, it’s easy to get overwhelmed. That’s why we’ve created this step-by-step guide to help you navigate through the process seamlessly. By the end of this article, you’ll be exporting your videos like a pro, ready to share them across platforms without any hiccups.
Let’s face it—video editing is both an art and a science. While iMovie is one of the most user-friendly tools out there, understanding its export settings can take your projects to the next level. So, whether you’re planning to upload your videos to YouTube, share them on social media, or save them for personal use, knowing how to export iMovie to MP4 is essential. Let’s get started!
- Selena Greene Vargas The Rising Star Of Modern Entertainment
- Pescis The Quintessential Guide To Everything Pesci
Why Exporting to MP4 Matters in iMovie
MP4 is not just another file format—it’s the gold standard in the world of digital video. Why? Because it’s compatible with almost every device, platform, and software you can think of. From smartphones to laptops, YouTube to Vimeo, MP4 ensures your videos look great everywhere. When you export your iMovie project to MP4, you’re essentially future-proofing your video content.
But wait, there’s more. MP4 files are optimized for both quality and size, meaning you don’t have to sacrifice one for the other. This makes them ideal for sharing online, where bandwidth and storage are often limited. Plus, they’re easy to edit further if you decide to make changes down the line. So, if you’re wondering why MP4 is the go-to choice, it’s all about versatility, reliability, and performance.
Key Benefits of Exporting to MP4
- Universal compatibility with devices and platforms
- Optimized for high-quality video playback
- Smaller file sizes without compromising quality
- Easy to upload and share online
- Perfect for further editing in other software
Understanding iMovie’s Export Options
Before we dive into the export process, let’s take a moment to understand the different export options iMovie offers. While MP4 is the most popular choice, iMovie gives you the flexibility to choose from various formats depending on your needs. Here’s a quick rundown:
- Is Fluffy Married Unveiling The Truth Behind The Fluffy Phenomenon
- Evelyn Melendez Knight A Journey Through Fame Success And Resilience
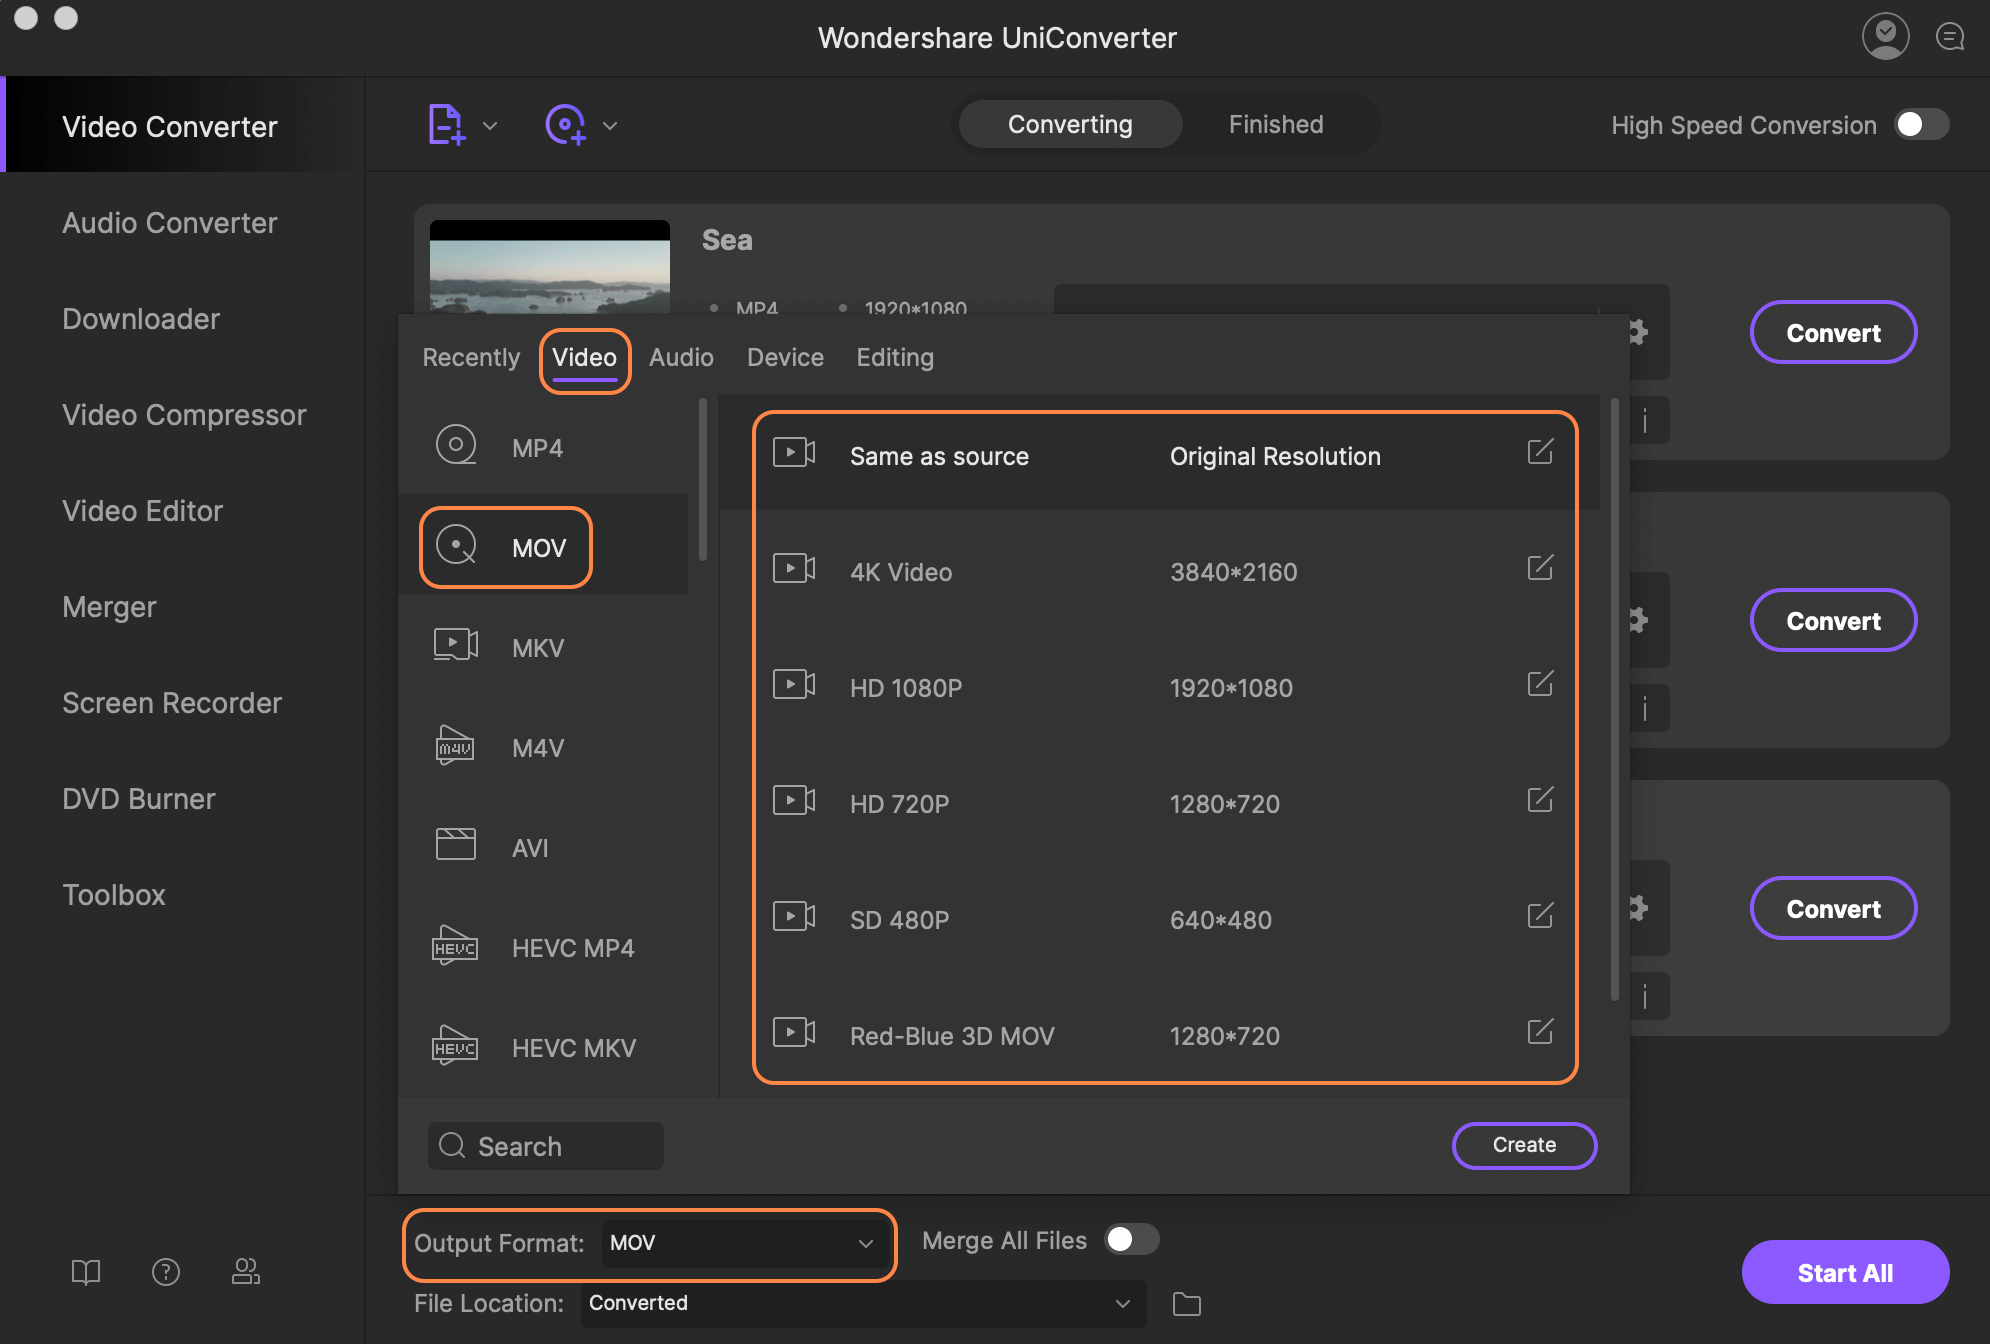
iMovie Export Formats: You can export your projects as MP4, MOV, or even MPEG-4. Each format has its own advantages, but MP4 stands out due to its widespread compatibility and efficiency. MOV, on the other hand, is often used for professional-grade video editing, while MPEG-4 is an older version of MP4 with slightly different compression techniques.
How to Access Export Settings in iMovie
Accessing export settings in iMovie is a breeze. Simply follow these steps:
- Open your iMovie project
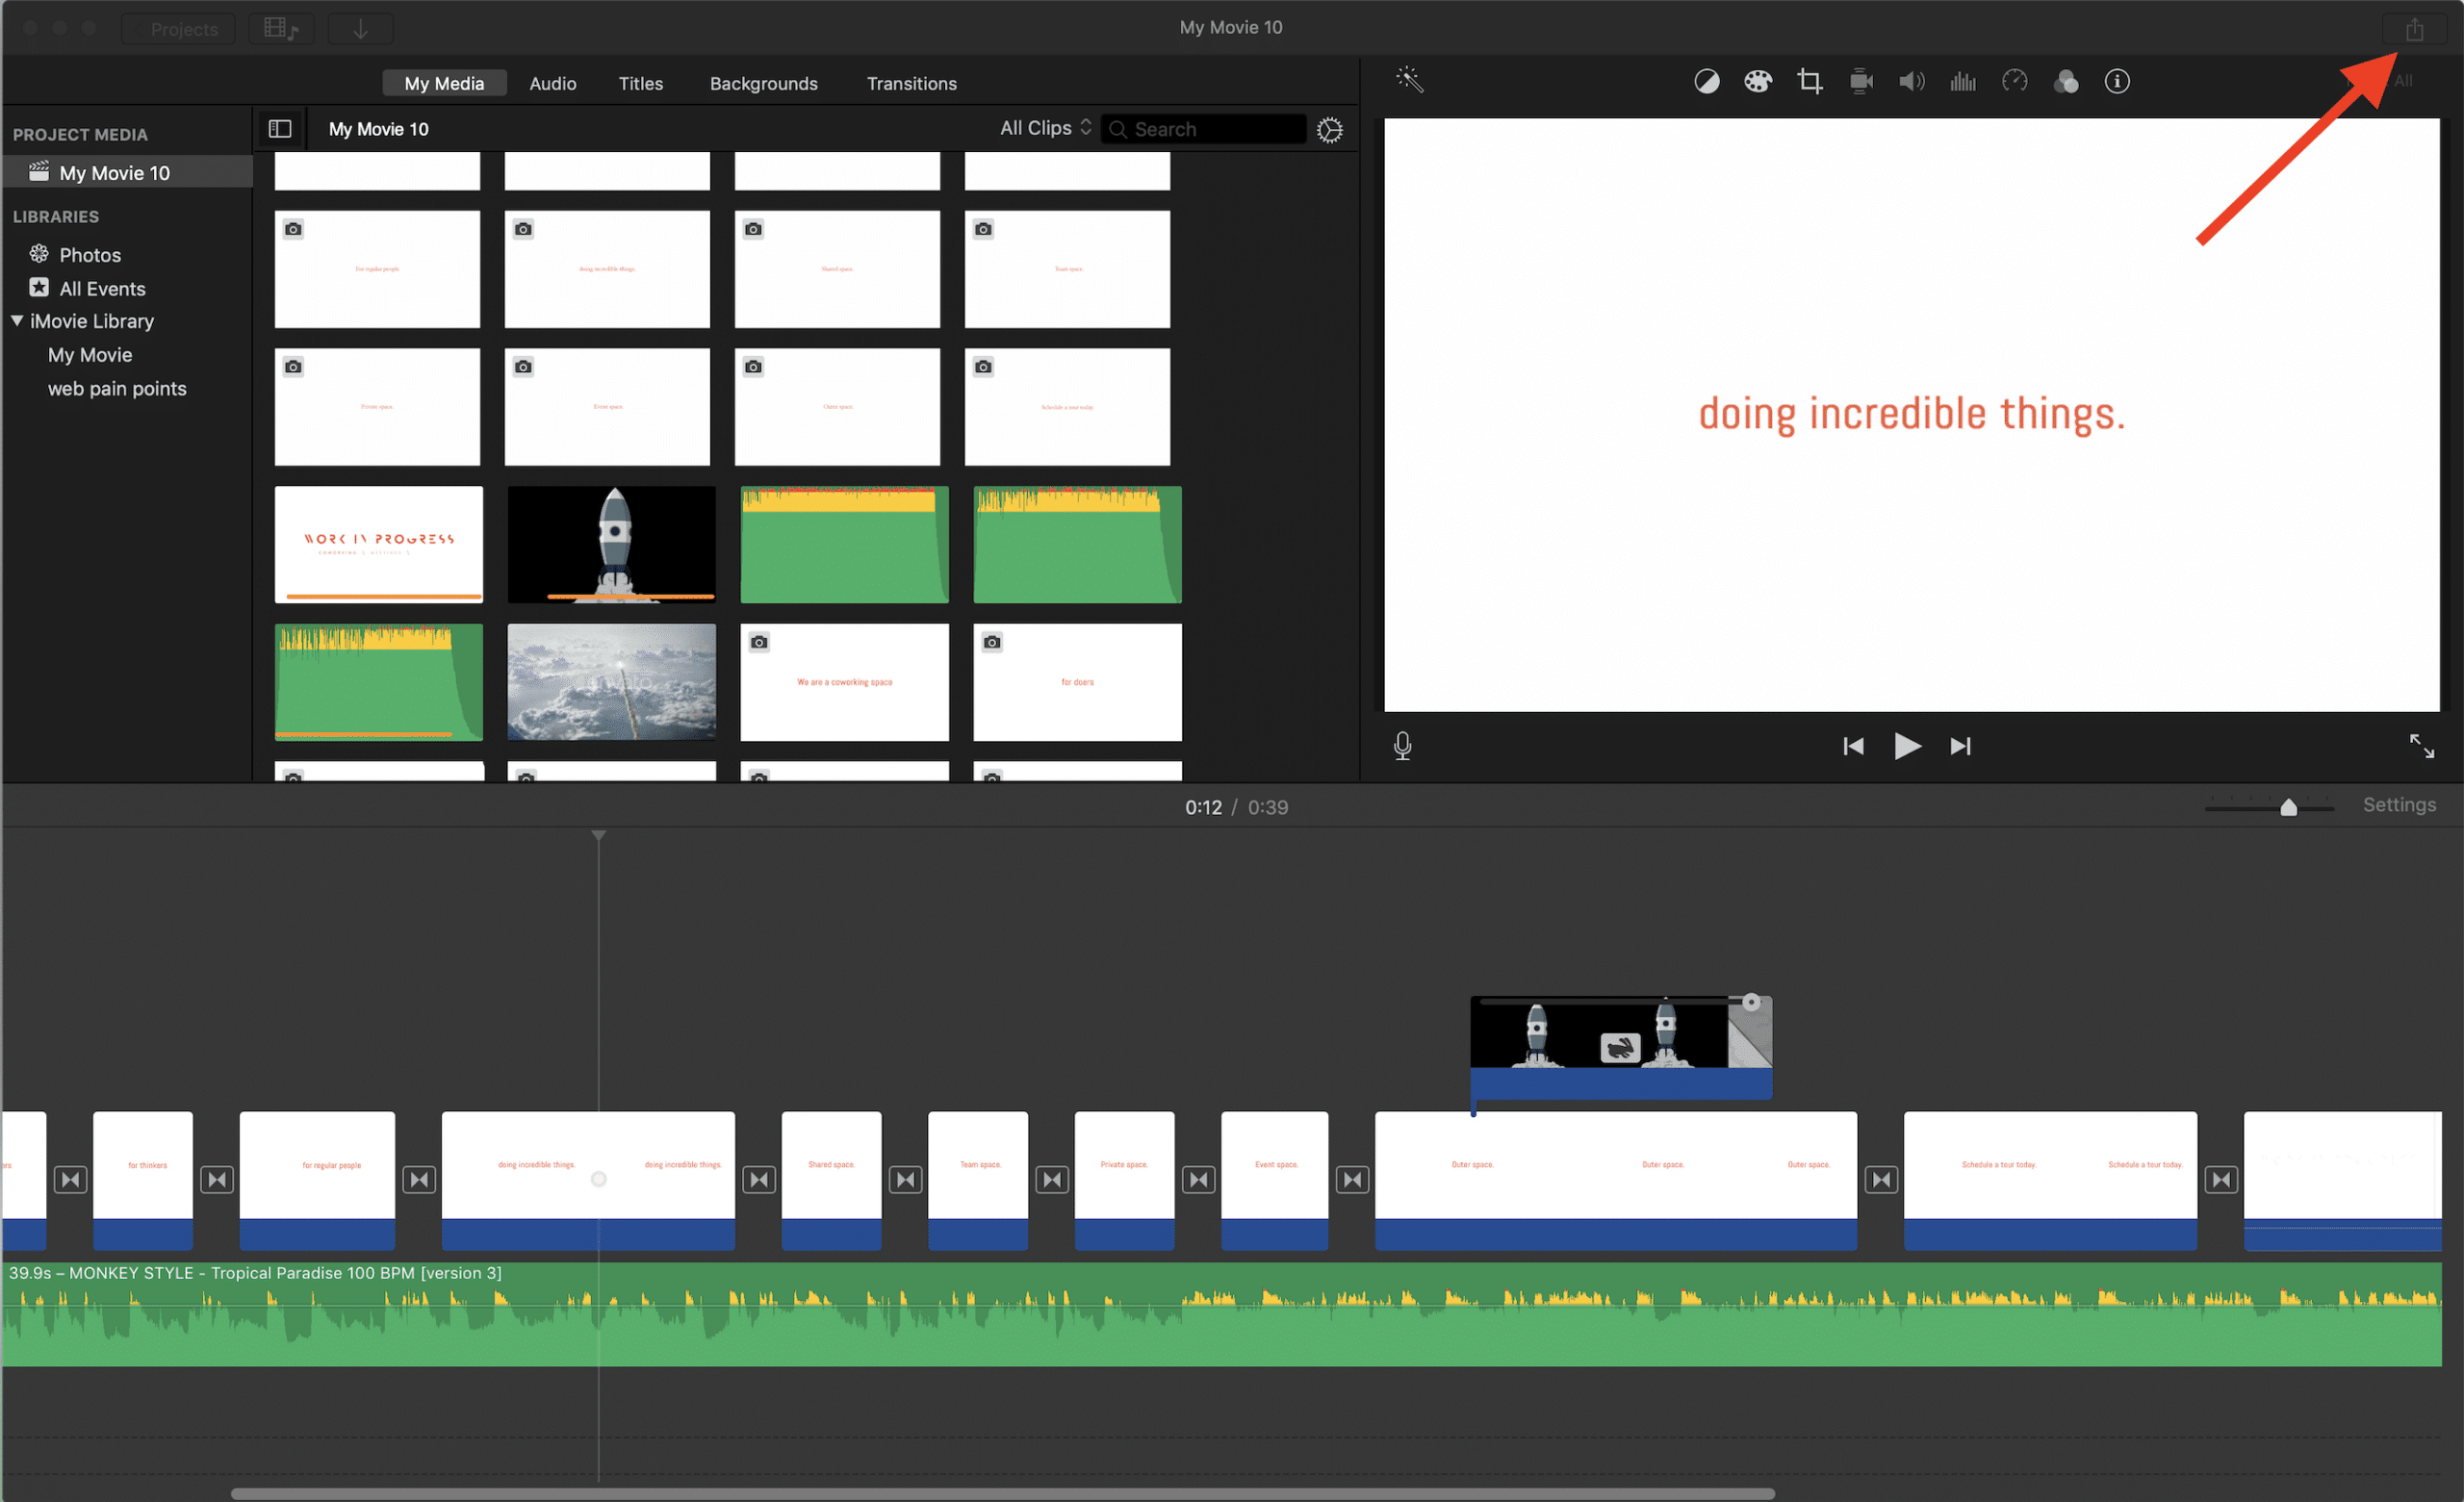
- Click on the "Share" button in the top menu
- Select "File" from the dropdown menu
- Choose your preferred format and adjust the settings
Once you’re in the export settings, you’ll see options like resolution, frame rate, and quality. These settings play a crucial role in determining the final output of your video, so make sure to choose wisely.
Step-by-Step Guide: How to Export iMovie to MP4
Now that you understand the importance of MP4 and how to access export settings, let’s walk through the process step by step. This guide is designed to be beginner-friendly, so even if you’re new to iMovie, you’ll have no trouble following along.
Step 1: Finalize Your iMovie Project
Before exporting, make sure your project is complete. Double-check your edits, transitions, and effects to ensure everything is in place. You don’t want to export a video only to realize you missed something important.
Step 2: Navigate to the Share Menu
Once your project is ready, click on the "Share" button located in the top menu bar. This will open a dropdown menu with various sharing options. For our purposes, select "File" to proceed with exporting your video as a file.
Step 3: Choose MP4 as Your Format
In the export window, you’ll see an option to select the file format. Choose MP4 from the dropdown menu. This ensures your video is exported in the most universally compatible format.
Step 4: Adjust Export Settings
Here’s where things get interesting. iMovie allows you to customize several export settings to suit your needs. Let’s break them down:
- Resolution: Choose between 720p, 1080p, or 4K depending on your requirements. For most online platforms, 1080p is the sweet spot.
- Frame Rate: Stick to 24fps or 30fps for smooth playback. Higher frame rates are ideal for action-packed videos.
- Quality: Opt for "High" quality to ensure your video looks sharp and vibrant.
Step 5: Save Your Exported Video
After adjusting the settings, click "Next" to save your exported video. Choose a location on your computer where you want to save the file, give it a name, and hit "Export." Sit back and relax while iMovie works its magic.
Tips and Tricks for Exporting iMovie to MP4
Exporting videos can sometimes be a bit tricky, especially if you’re working with large files or complex edits. Here are a few tips to help you streamline the process:
Tip 1: Optimize Your Project Before Exporting
Large projects with lots of clips and effects can slow down the export process. To speed things up, consider optimizing your project by:
- Deleting unused clips
- Reducing the number of effects
- Splitting the project into smaller segments
Tip 2: Use Preview Mode to Test Your Settings
Before exporting the entire project, use the preview mode to test your export settings. This allows you to catch any issues early on and make adjustments as needed.
Tip 3: Be Patient During the Export Process
Exporting large files can take time, so be patient. Avoid interrupting the process, as this can lead to corrupted files. Instead, let iMovie do its thing and enjoy a cup of coffee while you wait.
Common Issues and How to Fix Them
Even the best-laid plans can go awry, and exporting videos is no exception. Here are some common issues users face when exporting iMovie to MP4, along with their solutions:
Issue 1: Export Process Stalls
If your export process stalls or crashes, try restarting iMovie and your computer. This often resolves any temporary glitches. Additionally, ensure your system meets the minimum requirements for running iMovie smoothly.
Issue 2: File Size Too Large
Large file sizes can be a problem, especially if you’re planning to upload your video online. To reduce the file size, try lowering the resolution or frame rate. Alternatively, use a video compression tool to shrink the file without losing quality.
Issue 3: Video Quality Drops
If your exported video looks grainy or pixelated, it might be due to incorrect export settings. Double-check your resolution, frame rate, and quality settings to ensure they match your project requirements.
Advanced Techniques for Exporting iMovie to MP4
For those looking to take their video editing skills to the next level, here are some advanced techniques to enhance your export process:
Technique 1: Batch Exporting
If you have multiple projects to export, consider using batch exporting. This allows you to export several videos at once, saving you time and effort. To enable batch exporting, select all your projects and choose "Export Selected" from the share menu.
Technique 2: Custom Presets
iMovie allows you to create custom export presets tailored to your specific needs. This is especially useful if you frequently export videos with the same settings. To create a custom preset, simply save your current settings and give them a name for future use.
Conclusion: Mastering the Art of Exporting iMovie to MP4
Exporting iMovie projects to MP4 might seem daunting at first, but with the right knowledge and tools, it becomes second nature. By following the steps outlined in this guide, you’ll be well on your way to creating high-quality videos that look great on any platform.
Remember, practice makes perfect. The more you experiment with different export settings, the better you’ll become at optimizing your videos for various uses. So, don’t be afraid to try new things and push the boundaries of your creativity.
Now it’s your turn! Share your thoughts and experiences in the comments below. Did you find this guide helpful? What challenges did you face while exporting your videos? Let’s keep the conversation going and help each other become better video editors.
Table of Contents
- Why Exporting to MP4 Matters in iMovie
- Understanding iMovie’s Export Options
- Step-by-Step Guide: How to Export iMovie to MP4
- Tips and Tricks for Exporting iMovie to MP4
- Common Issues and How to Fix Them
- Advanced Techniques for Exporting iMovie to MP4
- Conclusion: Mastering the Art of Exporting iMovie to MP4
- Who Is Scott Eastwoods Mom Unveiling The Life Of A Hollywood Legacy
- Claudia Heffner Peltz Age Unveiling The Story Behind The Iconic Name
How to export as mp4 in After Effects
How to export an imovie as mp4 kseski
How to Export iMovie File to iPhone · Kenny Eliason
