How To Convert IMovie File To MP4 Like A Pro
Alright folks, if you're stuck wondering how to convert iMovie files to MP4, you're not alone. iMovie is a fantastic tool for editing videos on macOS, but sometimes it leaves us scratching our heads when it comes to exporting files in the right format. Don’t worry, I’ve got your back! Whether you’re trying to share your masterpiece on YouTube, upload it to social media, or just save it for personal use, converting iMovie files to MP4 is simpler than you think.
Let’s face it, iMovie is great for creating stunning videos, but the default file formats it generates can be a bit tricky to work with if you're not familiar with them. You might end up with files in .imovie or .mov formats, which aren’t always compatible with every platform or device. So, learning how to convert iMovie files to MP4 is essential if you want to make sure your videos are universally playable.
In this guide, we’re going to break down everything you need to know about converting iMovie files to MP4. From simple built-in methods to using third-party tools, we’ll cover all the bases so you can get your video exactly where it needs to go. Let’s dive in!
- Popcorn Filx Your Ultimate Movie Streaming Companion
- Debby Clarke And Bill Belichick A Story Thats Got Everyone Talking
Why You Need to Convert iMovie Files to MP4
Before we jump into the how-to, let’s talk about why converting iMovie files to MP4 is such a big deal. MP4 is one of the most widely accepted video formats out there. It’s compatible with almost every device, platform, and service, making it the perfect choice for sharing your videos.
Advantages of Using MP4
Here’s a quick rundown of why MP4 is the go-to format:
- High-quality video and audio compression
- Compatibility with almost all devices and platforms
- Smaller file sizes compared to other formats
- Supports metadata, subtitles, and multiple audio tracks
So, whether you’re planning to upload your video to YouTube, send it to a friend, or store it on a flash drive, MP4 is the way to go.
- Is Colin Cowherd Married The Inside Scoop You Wont Want To Miss
- Alexis Maas Now The Evolution Of A Rising Star In The Spotlight
Understanding iMovie File Formats
Now that we know why MP4 is the best choice, let’s take a moment to understand the file formats iMovie uses. When you finish editing a video in iMovie, you’ll typically end up with one of two formats:
- .imovie: This is the project file format. It contains all the edits, clips, and effects you’ve added, but it’s not a playable video file.
- .mov: This is the exported video file format. It’s playable, but not as widely supported as MP4.
If you want your video to be compatible with everything, you’ll need to convert it to MP4. Lucky for you, it’s not as hard as it sounds!
How to Convert iMovie Files to MP4 Using Built-in Options
iMovie actually makes it pretty easy to export your videos in MP4 format. Here’s how you can do it:
Step 1: Open Your Project in iMovie
Start by opening the iMovie project you want to convert. Make sure everything looks good and you’re happy with the edits before moving on.
Step 2: Choose Export Settings
Once your project is open, click on the "Share" button in the top menu. From there, select "File" from the dropdown menu. This will bring up the export settings.
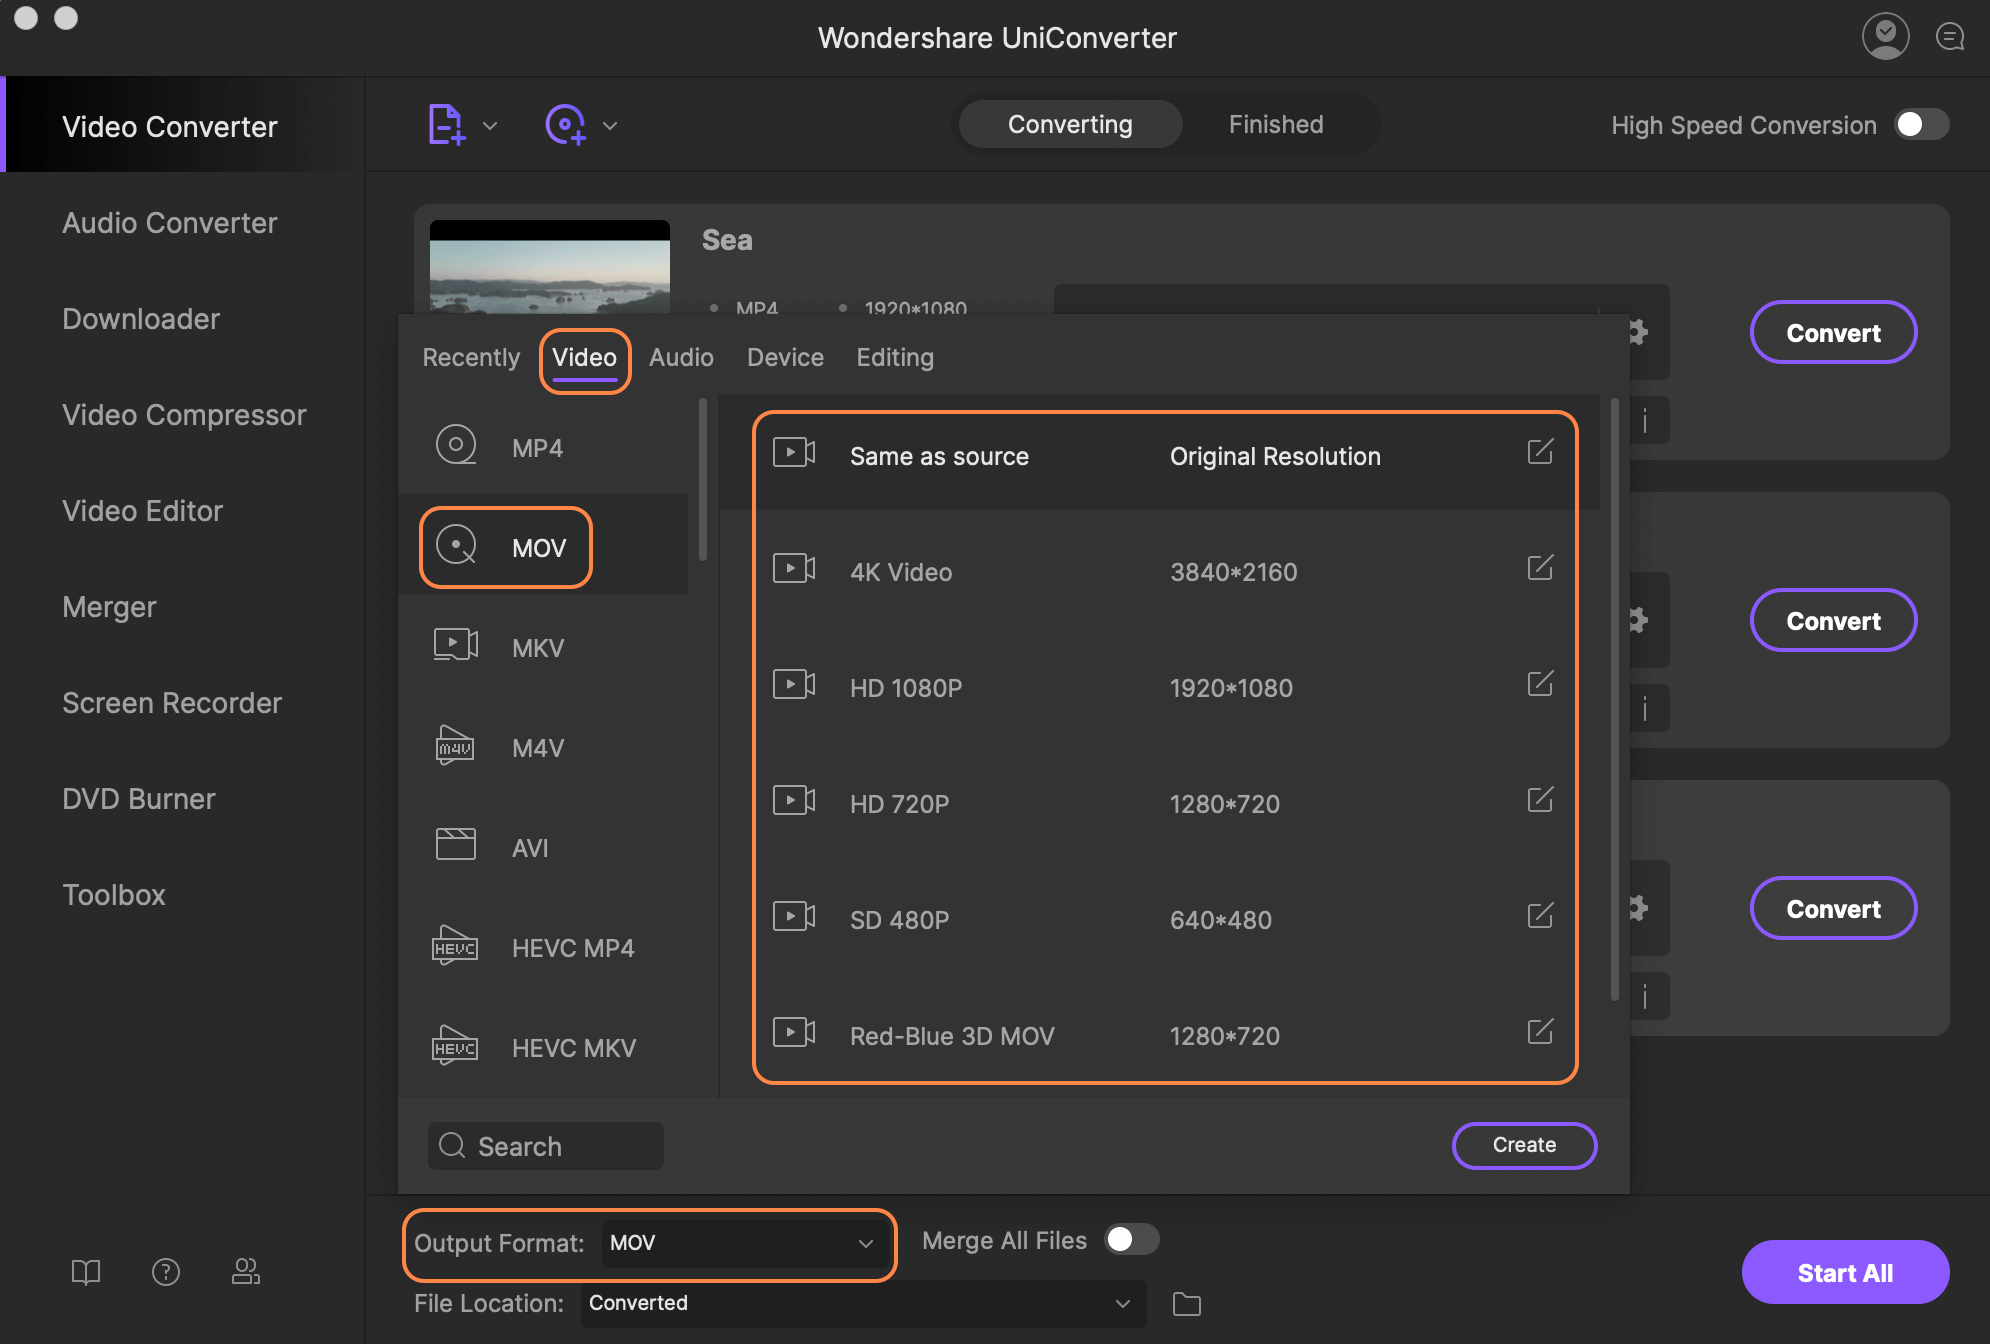
Step 3: Select MP4 as the Format
In the export window, you’ll see an option to choose the file format. Make sure you select MP4 from the dropdown menu. You can also adjust the resolution and quality settings here to suit your needs.
Step 4: Save Your File
After setting everything up, click "Next" and choose a location to save your file. Give it a name and hit "Export." That’s it! Your iMovie file is now an MP4.
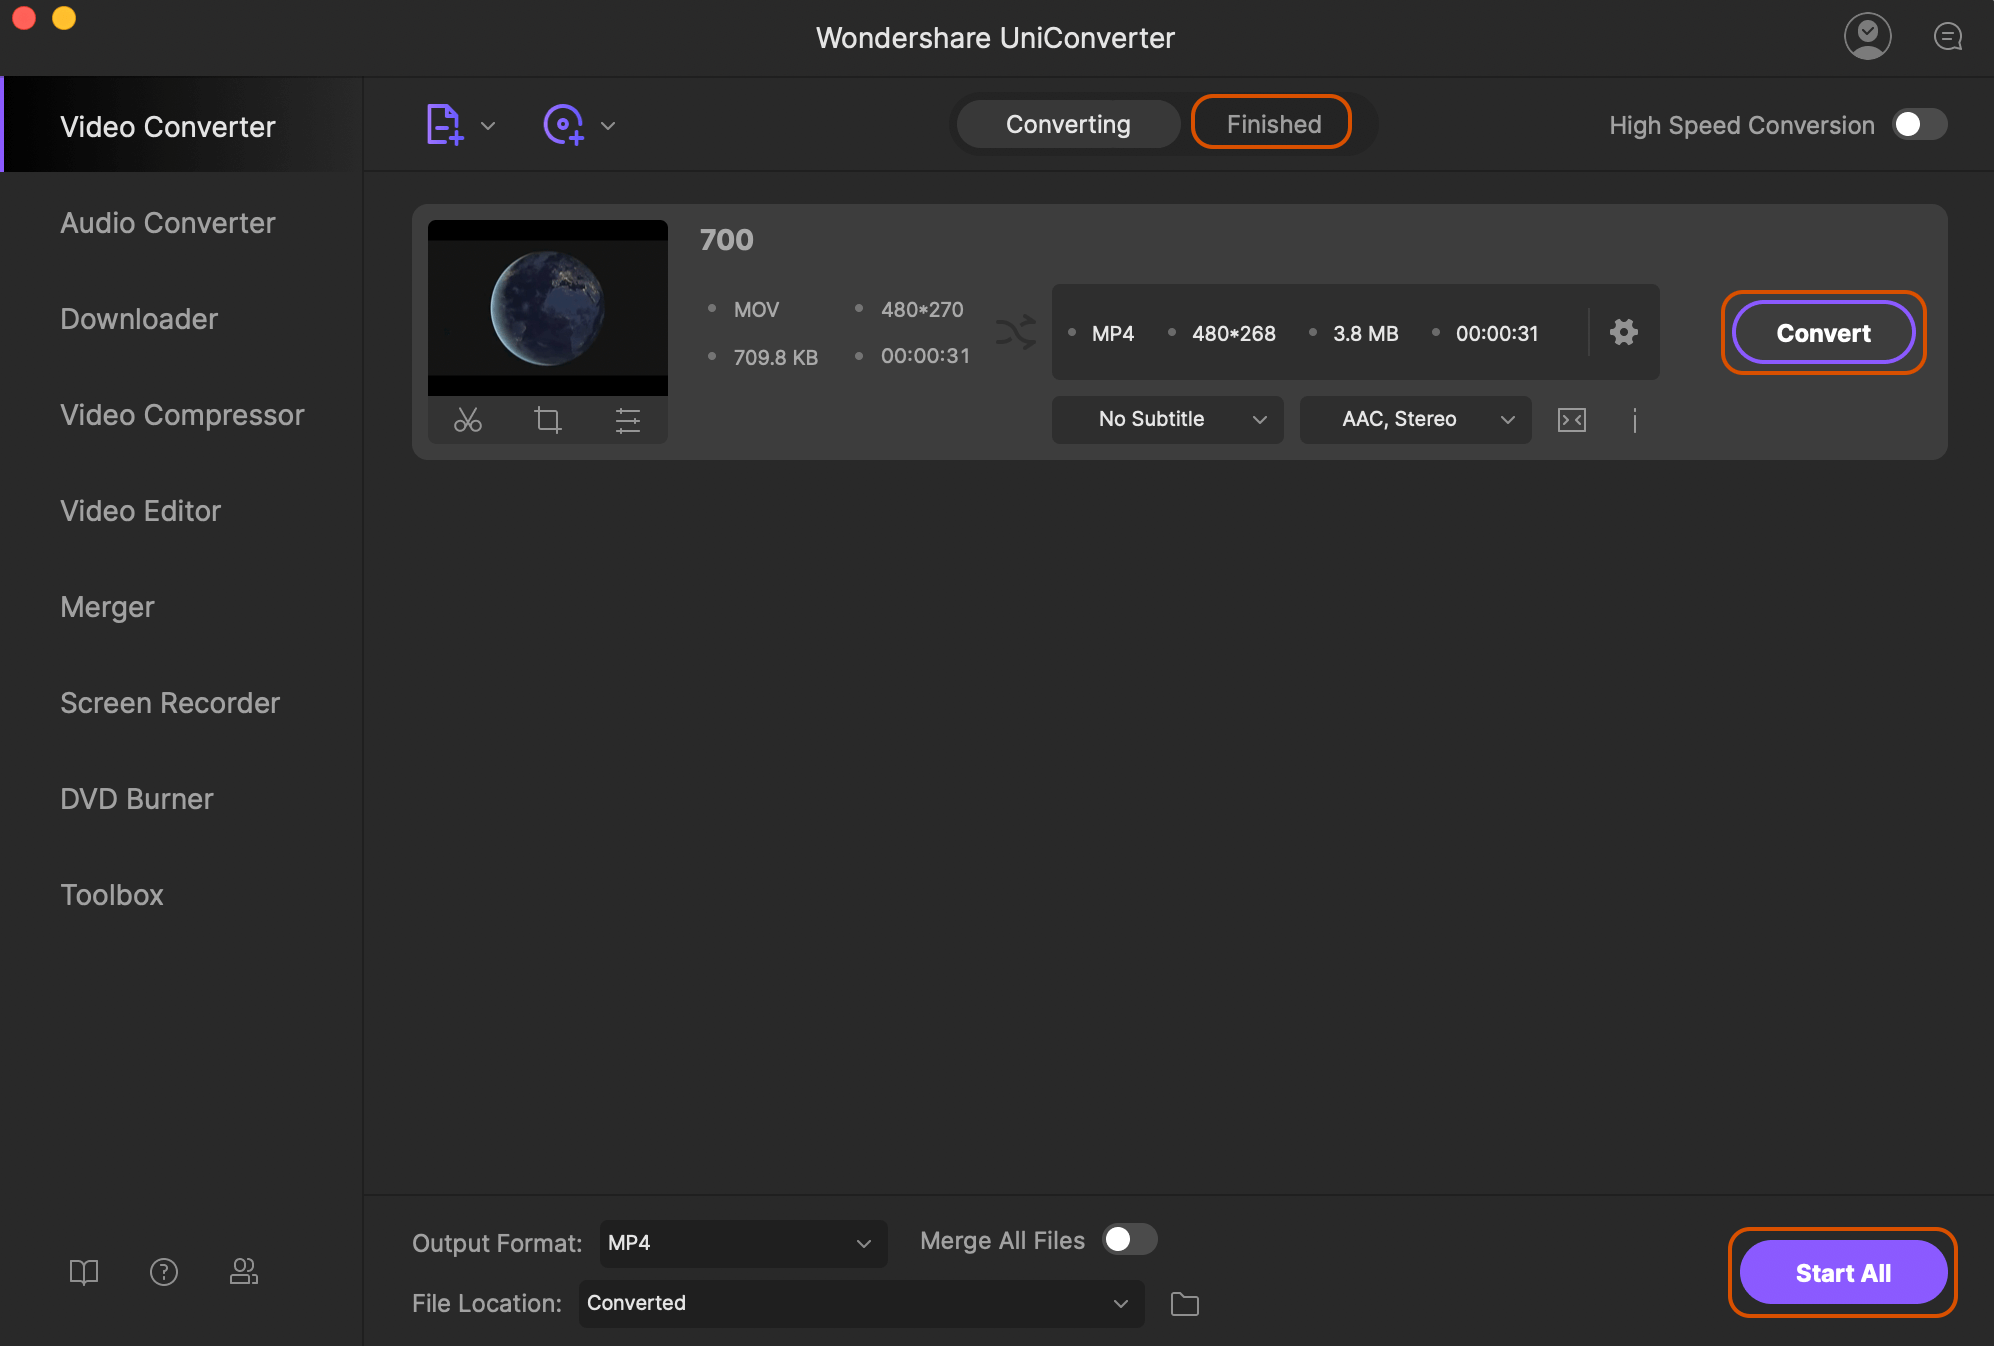
Using Third-Party Tools to Convert iMovie Files
Sometimes, the built-in options in iMovie just don’t cut it. Maybe you need more advanced settings or better compression. That’s where third-party tools come in. There are plenty of great software options out there that can help you convert iMovie files to MP4 with ease.
Popular Tools for Conversion
- HandBrake: A free, open-source tool that’s great for converting videos to MP4.
- Adobe Premiere Pro: If you’re already using Adobe for editing, it’s a no-brainer to use it for conversion too.
- Final Cut Pro: Another powerful tool for video editing and conversion.
Each of these tools has its own strengths, so choose the one that best fits your needs.
Tips for Getting the Best Results
Converting iMovie files to MP4 is pretty straightforward, but there are a few things you can do to make sure your final video looks its best:
- Adjust Resolution: Choose the right resolution for your intended use. 1080p is a good all-around choice.
- Set Bitrate: Higher bitrates mean better quality, but also larger file sizes. Find a balance that works for you.
- Add Metadata: Include details like title, description, and tags to make your video more searchable.
By fine-tuning these settings, you can ensure your video looks great and plays smoothly on any device.
Common Issues and How to Fix Them
Even with the best tools and techniques, you might run into a few issues when converting iMovie files to MP4. Here are some common problems and how to solve them:
Issue 1: File Won’t Export
Solution: Make sure your project is fully saved and all assets are properly linked. Restart iMovie and try again.
Issue 2: Video Quality is Poor
Solution: Check your export settings and increase the resolution or bitrate if needed.
Issue 3: Audio is Out of Sync
Solution: Re-export the file and make sure audio and video tracks are properly aligned in your project.
These tips should help you troubleshoot any problems you encounter during the conversion process.
How to Optimize Your MP4 Files for Sharing
Once you’ve converted your iMovie file to MP4, you might want to optimize it for sharing on different platforms. Here are a few tips to make sure your video looks great wherever you post it:
- YouTube: Use a resolution of 1080p or higher and set the bitrate to at least 8 Mbps.
- Instagram: Stick to vertical or square formats for best results.
- Facebook: Keep file sizes under 4GB for optimal performance.
By tailoring your settings to each platform, you can ensure your video looks its best no matter where it’s viewed.
Conclusion
Alright folks, that’s the lowdown on how to convert iMovie files to MP4. Whether you’re using the built-in options in iMovie or leveraging third-party tools, the process is straightforward and relatively painless. Just remember to adjust your settings based on your needs and the platform you’re sharing on.
Now it’s your turn! Take what you’ve learned and start converting those iMovie files to MP4. And don’t forget to share your experiences in the comments below. If you found this guide helpful, be sure to check out our other articles on video editing and conversion. Happy editing!
Table of Contents
- Why You Need to Convert iMovie Files to MP4
- Understanding iMovie File Formats
- How to Convert iMovie Files to MP4 Using Built-in Options
- Using Third-Party Tools to Convert iMovie Files
- Tips for Getting the Best Results
- Common Issues and How to Fix Them
- How to Optimize Your MP4 Files for Sharing
- Pescis The Quintessential Guide To Everything Pesci
- Melissa Carrey The Rising Star Whos Taking The World By Storm
How to Convert iMovie to MP4 on Mac iMovie to MP4 Converter
Easy Steps to Convert and Import MP4 to iMovie on Mac

How to Convert MOV Files to MP4 Format Digital Trends
