How To Export IMovie Into MP4: The Ultimate Guide For Video Editors
Ever wondered how to export iMovie into MP4 without losing quality? Well, you're not alone. Thousands of creators out there are looking for the same answer. iMovie is a powerful tool, but navigating its export options can feel like trying to solve a puzzle. Don’t worry, though—we’ve got your back. In this guide, we’ll walk you through the process step by step, so you can master exporting your videos in MP4 format like a pro.
There’s nothing worse than finishing a masterpiece in iMovie, only to find out you’re stuck when it comes to exporting it in the right format. Whether you’re sharing your video on YouTube, sending it to a client, or simply archiving it, having your project in MP4 is essential. It’s universally compatible, easy to share, and retains excellent quality. So, let’s dive in and make sure you never face this issue again.
Before we get into the nitty-gritty, let’s clear something up. iMovie is awesome, but it doesn’t always make things straightforward, especially when it comes to file formats. You might be tempted to just hit “Share” and hope for the best, but trust me, that’s not the way to go. By the end of this guide, you’ll know exactly how to export iMovie into MP4, and you’ll be doing it like a champ. Let’s get started!
- Jacelyn Reeves Today A Stars Journey Through Time
- Hallie Gnatovich Movies Rising Star In The Film Industry
Why Exporting iMovie to MP4 is Important
When it comes to video editing, having the right file format is key. MP4 is one of the most widely used formats for videos because it strikes the perfect balance between quality and file size. If you’re working on a project in iMovie, chances are you’ll want to export it as an MP4 at some point. Whether you’re uploading to social media, sending it to a collaborator, or just saving it for future use, MP4 is the way to go.
Here’s the deal: iMovie gives you a lot of flexibility, but if you’re not careful, you might end up with a file that’s too big, too small, or just plain incompatible. That’s why knowing how to export iMovie into MP4 is so important. It ensures your video looks great no matter where it’s viewed, and it keeps your file size manageable. Who wants to wait forever for a video to upload, right?
Advantages of MP4 Over Other Formats
Let’s break it down. Why is MP4 the go-to format for so many creators? Here are a few reasons:
- Where Is Yellow Spring Road Located Uncovering The Hidden Gem
- Taylor Fritz Divorced The Untold Story Behind The Headlines
- Compatibility: MP4 works on almost every device and platform out there. From smartphones to laptops to TVs, you can be sure your video will play smoothly.
- Quality: MP4 uses advanced compression techniques to maintain high-quality visuals without ballooning the file size. This means your video will look sharp, even on high-resolution screens.
- File Size: Compared to other formats like MOV or AVI, MP4 is much more efficient. You get the same quality in a smaller package, which makes it easier to share and store.
- Flexibility: MP4 supports both video and audio streams, making it perfect for everything from music videos to vlogs.
So, if you’re asking yourself, “Why should I bother exporting iMovie into MP4?” the answer is simple: it’s the best choice for most situations. Now, let’s move on to the steps you need to follow.
Step-by-Step Guide: How to Export iMovie into MP4
Alright, let’s get down to business. Here’s a step-by-step guide to exporting your iMovie project into MP4. Follow these instructions carefully, and you’ll have your video ready in no time.
Step 1: Finish Your Project
First things first, make sure your project is complete. Double-check everything—transitions, effects, audio levels, and anything else you’ve added. Once you’re happy with how it looks, you’re ready to move on to the next step.
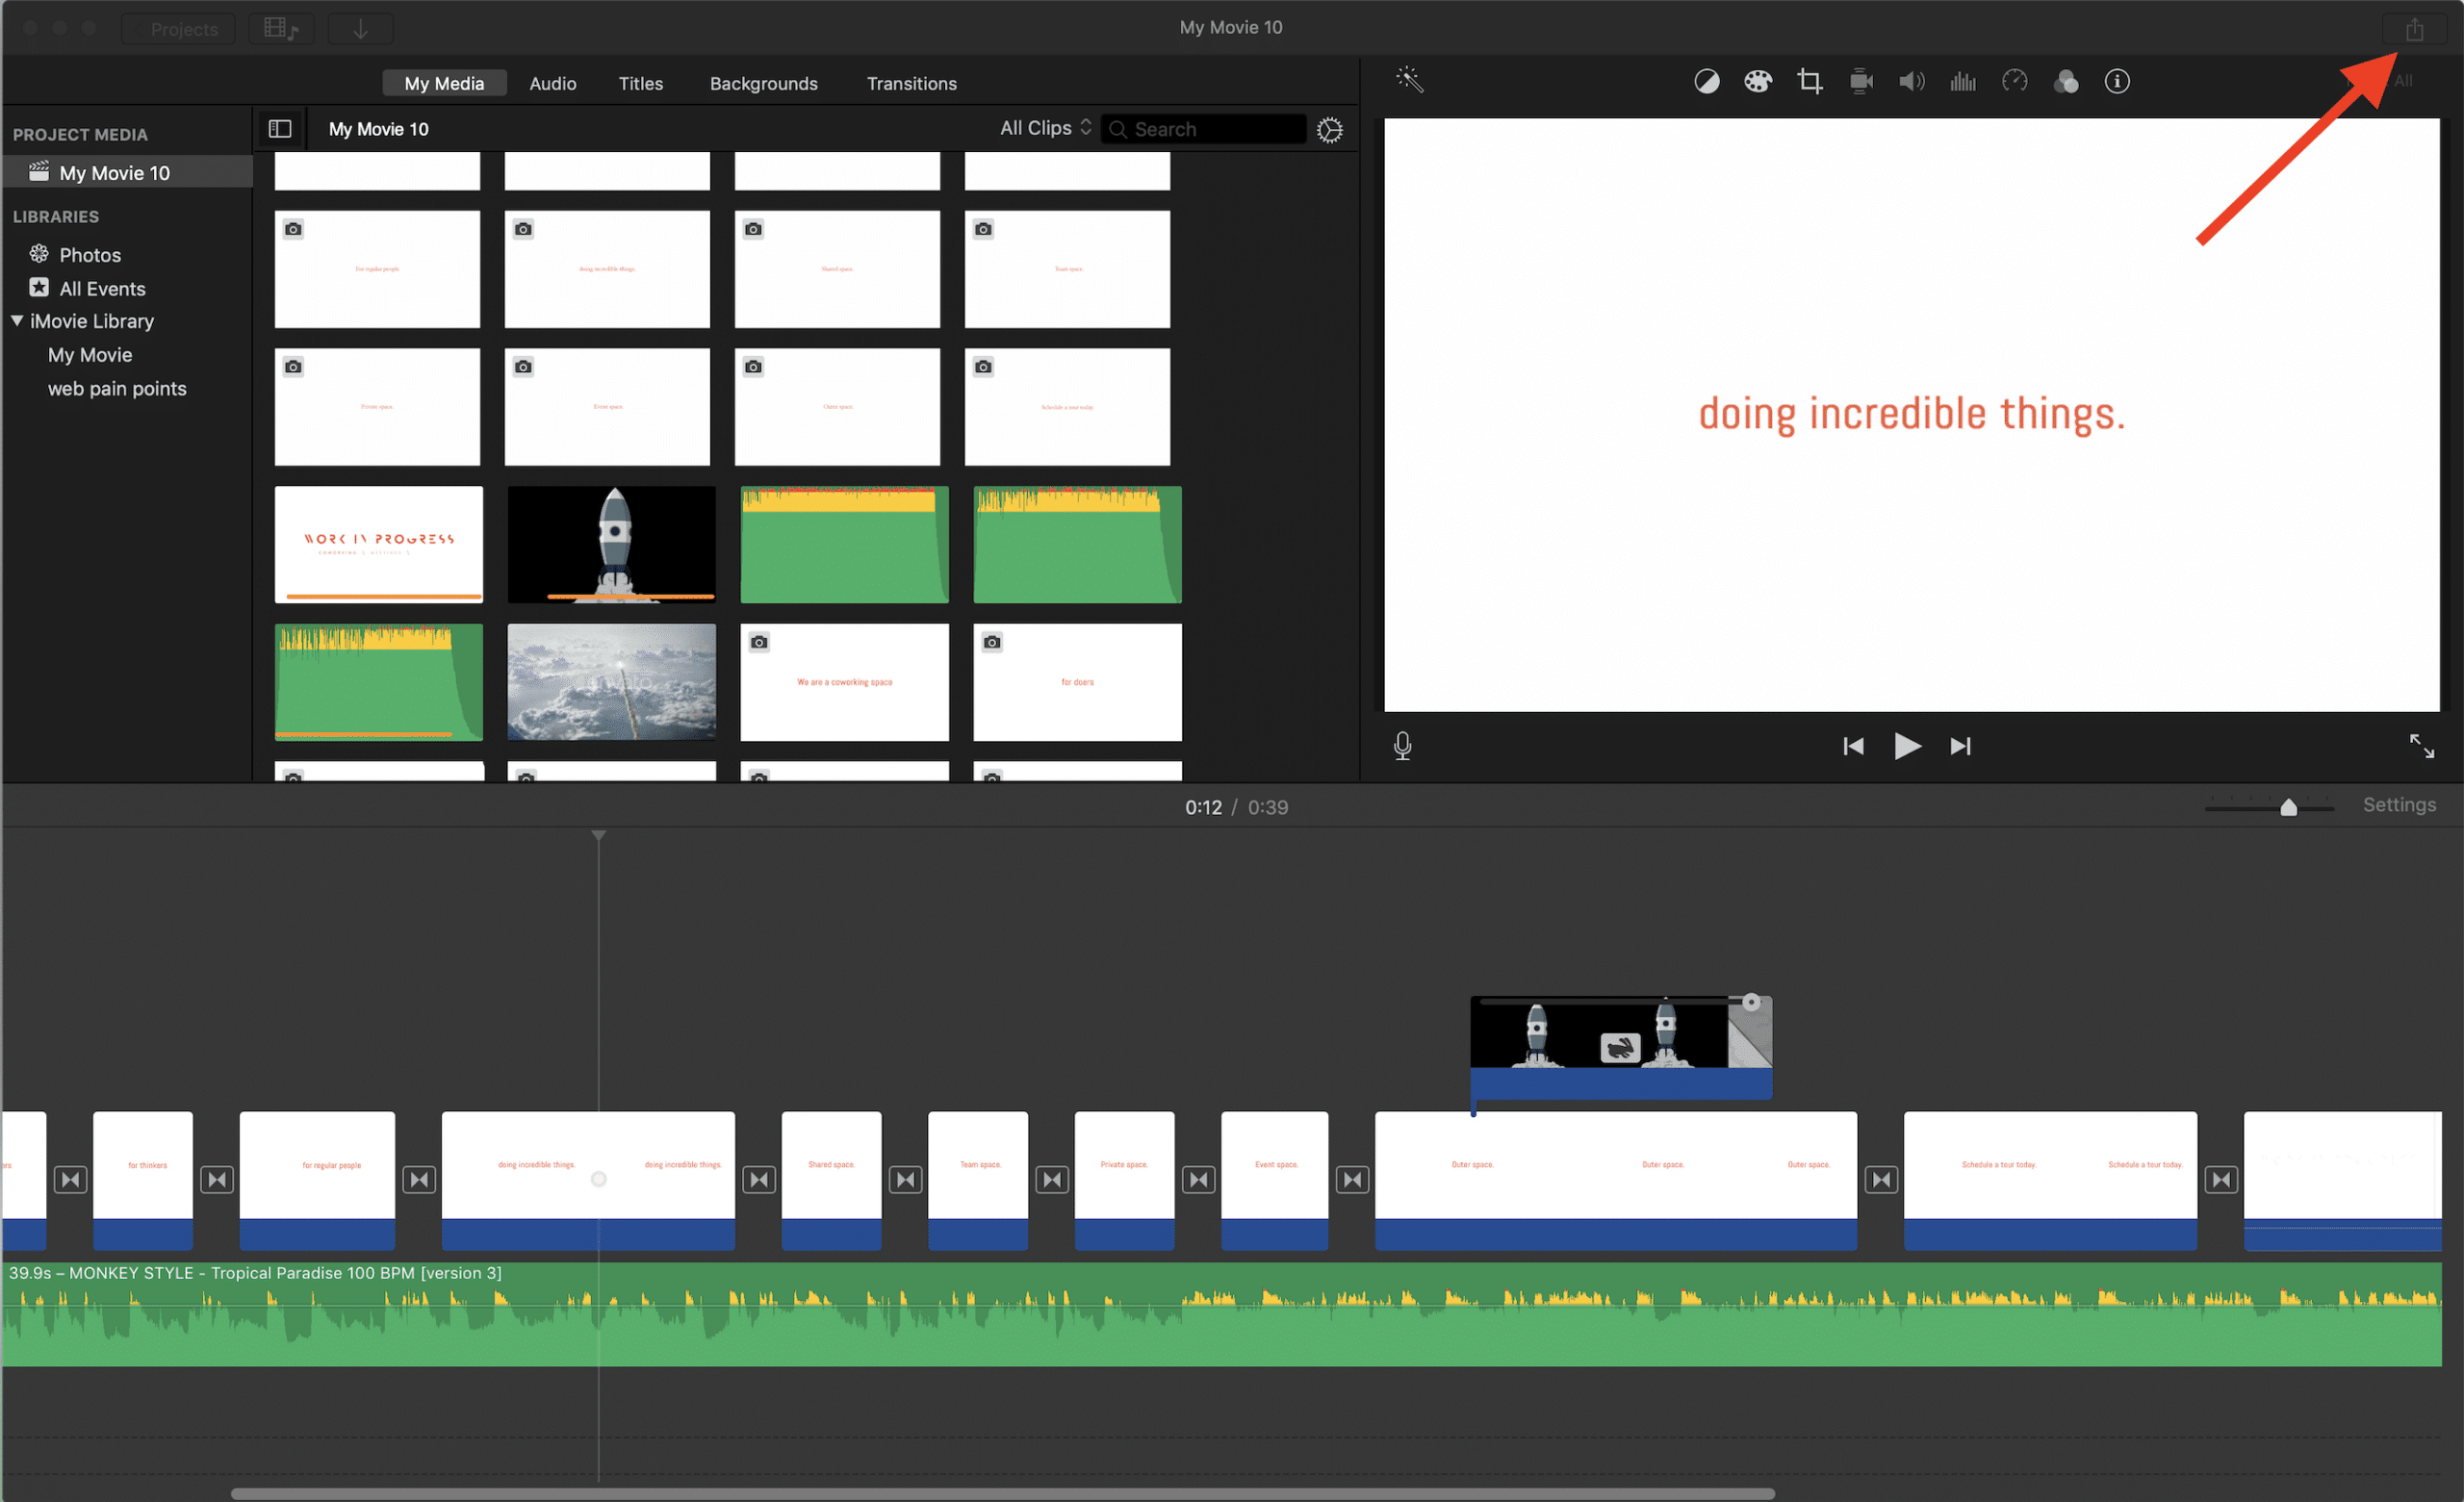
Step 2: Choose the Right Export Option
Now, head over to the top menu and click on “File.” From there, select “Share” and choose “File.” This will open up a new window where you can customize your export settings.
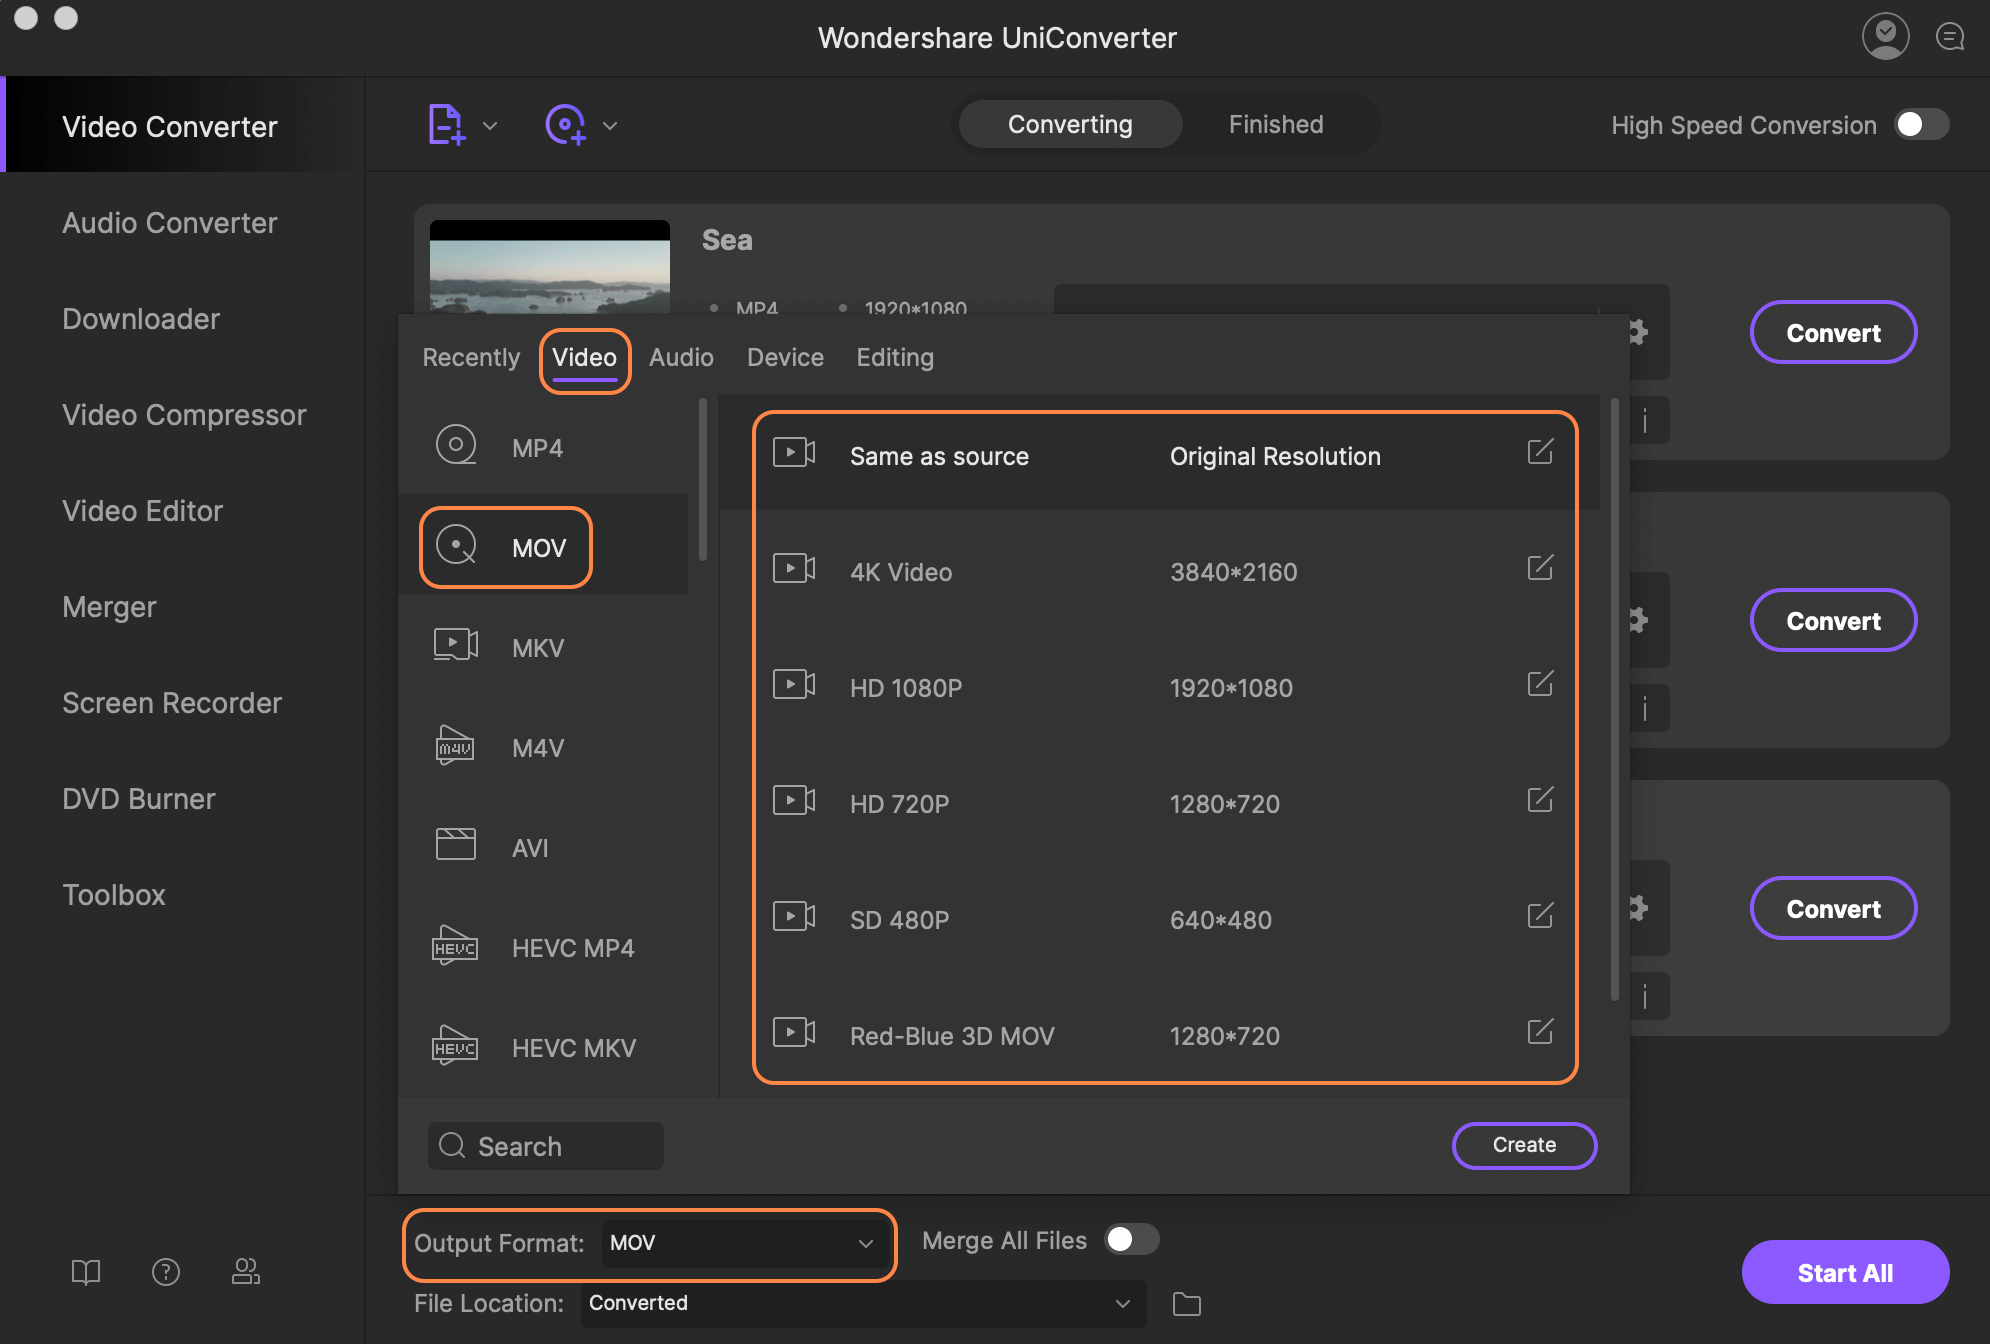
Step 3: Select MP4 as Your Format
In the export window, you’ll see a dropdown menu labeled “Format.” Make sure you select MP4 from the options available. Trust me, this is crucial. If you choose the wrong format, you might end up with a file that doesn’t work where you need it to.
Step 4: Customize Your Settings
Once you’ve chosen MP4, you can tweak some additional settings to optimize your file. Here’s what you need to consider:
- Resolution: Choose the resolution that best suits your needs. For most purposes, 1080p is a safe bet. If you’re planning to upload to YouTube or another platform, check their recommended settings.
- Frame Rate: Stick to 30fps or 60fps, depending on the type of video you’re creating. Action-packed scenes might benefit from a higher frame rate.
- Quality: You can choose between High, Medium, and Low quality. For most cases, High is the way to go, but if you’re short on storage, Medium might be a good compromise.
Step 5: Save Your File
After setting everything up, click “Next” and choose a location to save your file. Give it a meaningful name (no one likes “video123.mp4”), and hit “Export.” Sit back and relax while iMovie works its magic.
Tips for Exporting iMovie into MP4
Exporting your video might seem straightforward, but there are a few tips and tricks that can make the process smoother. Here are some things to keep in mind:
- Test Your Settings: Before exporting the final version, try exporting a short clip with the same settings to see how it looks. This will help you avoid any unpleasant surprises.
- Use a Strong Internet Connection: If you’re planning to upload your video right after exporting, make sure your internet is stable. Nothing’s worse than losing progress halfway through.
- Be Patient: Exporting a large file can take some time, especially if you’ve chosen high-quality settings. Don’t rush the process—let iMovie do its thing.
Common Issues When Exporting iMovie into MP4
Even with the best intentions, things can go wrong. Here are some common issues you might encounter and how to fix them:
Issue 1: Export Takes Too Long
Solution: If your export is taking forever, try reducing the resolution or lowering the quality setting. This will speed up the process, but keep in mind it might affect the final output.
Issue 2: File Won’t Play on Certain Devices
Solution: Double-check your export settings to ensure they’re compatible with the device you’re using. Sometimes, adjusting the resolution or frame rate can solve the problem.
Issue 3: Audio Sync Problems
Solution: If your audio and video are out of sync, try re-exporting the file. In rare cases, restarting iMovie or your computer might help.
Advanced Techniques for Exporting iMovie into MP4
Once you’ve mastered the basics, you might want to explore some advanced techniques to take your exports to the next level. Here are a few ideas:
Technique 1: Use Third-Party Software
While iMovie is great, sometimes it’s not enough. Consider using software like Handbrake or Adobe Premiere Pro to further refine your MP4 exports. These tools offer more control over compression, encoding, and other advanced settings.
Technique 2: Batch Export
If you’re working on multiple projects, batch exporting can save you a ton of time. Instead of exporting each file individually, set up a batch export process to handle everything at once.
Technique 3: Optimize for Specific Platforms
Different platforms have different requirements. For example, YouTube prefers 1080p at 30fps, while TikTok works best with vertical videos. Tailor your export settings to match the platform you’re targeting.
Conclusion: Mastering How to Export iMovie into MP4
And there you have it—everything you need to know about exporting iMovie into MP4. By following the steps outlined in this guide, you’ll be able to create high-quality videos that look great on any device. Remember, practice makes perfect, so don’t be afraid to experiment with different settings and techniques.
Now it’s your turn. Try exporting your next project using the methods we’ve discussed, and let us know how it goes. Feel free to leave a comment below, share this article with your fellow creators, or check out our other guides for more tips and tricks. Happy editing!
Table of Contents
- How to Export iMovie into MP4: The Ultimate Guide for Video Editors
- Why Exporting iMovie to MP4 is Important
- Advantages of MP4 Over Other Formats
- Step-by-Step Guide: How to Export iMovie into MP4
- Tips for Exporting iMovie into MP4
- Common Issues When Exporting iMovie into MP4
- Advanced Techniques for Exporting iMovie into MP4
- Conclusion: Mastering How to Export iMovie into MP4
- Who Is Harold Fords Mother Unveiling The Life And Legacy Behind The Scenes
- Courtney Reum Net Worth The Inside Scoop On Her Financial Empire And Lifestyle

How to Burn iMovie Projects to DVD Complete Guide
How to export an imovie as mp4 kseski
How to Export iMovie File to iPhone · Kenny Eliason
