Mastering IMovie Export To MP4: The Ultimate Guide For Everyday Editors
So, you've been diving deep into iMovie, crafting your masterpiece frame by frame, and now you're ready to share it with the world. But wait—how do you get that video out of iMovie and into a universally accepted format like MP4? Don’t sweat it, because you’re in the right place. Exporting iMovie projects to MP4 is easier than you think, and we’re here to break it down step by step. Whether you're a newbie or a seasoned editor, this guide will have you exporting like a pro in no time.
Let’s be honest—iMovie is one of the most user-friendly video editing tools out there. It’s free, it’s powerful, and it’s perfect for anyone who wants to dabble in video editing without breaking the bank. But the real magic happens when you can share your creations with others. And that’s where exporting to MP4 comes in. This file format is widely supported by almost every device, platform, and streaming service out there, making it the go-to choice for sharing videos.
Now, if you're scratching your head wondering how to get your iMovie project into MP4 format, don’t worry. We’ve got you covered. In this guide, we’ll walk you through the entire process, from the basics of exporting to advanced tips that’ll make your videos look and sound amazing. Let’s get started, shall we?
- Melissa Carrey The Rising Star Whos Taking The World By Storm
- Gena Okelly A Rising Star In The Spotlight
Why MP4 Is the King of Video Formats
Before we dive into the nitty-gritty of exporting iMovie to MP4, let’s talk about why MP4 is such a big deal. First off, MP4 is not just a video format—it’s a container that can hold both video and audio files. Think of it like a suitcase that can carry everything you need for your trip. MP4 is compatible with almost every device you can think of, from smartphones to smart TVs, and it’s supported by all major video platforms, including YouTube, Vimeo, and TikTok.
But that’s not all. MP4 offers excellent compression, meaning your videos will look great without taking up too much space. This is especially important if you’re sharing videos online or sending them via email. Plus, MP4 supports high-definition (HD) and even 4K resolution, so your videos will look sharp and crisp no matter where they’re viewed.
And let’s not forget about accessibility. Most people know what an MP4 file is and how to play it. No complicated conversions or downloads required. It’s simple, efficient, and just works. So, if you’re looking to share your iMovie creations with the world, exporting to MP4 is the way to go.
- Is Fluffy Married Unveiling The Truth Behind The Fluffy Phenomenon
- Shayanna Jenkins And Her Sister Relationship Now A Closer Look
Step-by-Step Guide to Exporting iMovie to MP4
Ready to roll? Let’s walk through the process of exporting your iMovie project to MP4. It’s simpler than you might think, and with these steps, you’ll have your video ready to share in no time.
1. Finalize Your Project
Before you export, make sure your iMovie project is ready to go. Double-check your edits, adjust any audio levels, and tweak the color grading if needed. Once you’re happy with everything, you’re good to proceed.
2. Choose the Right Export Settings
When it comes to exporting, the settings you choose can make a big difference in the quality and size of your video. Here’s what you need to do:
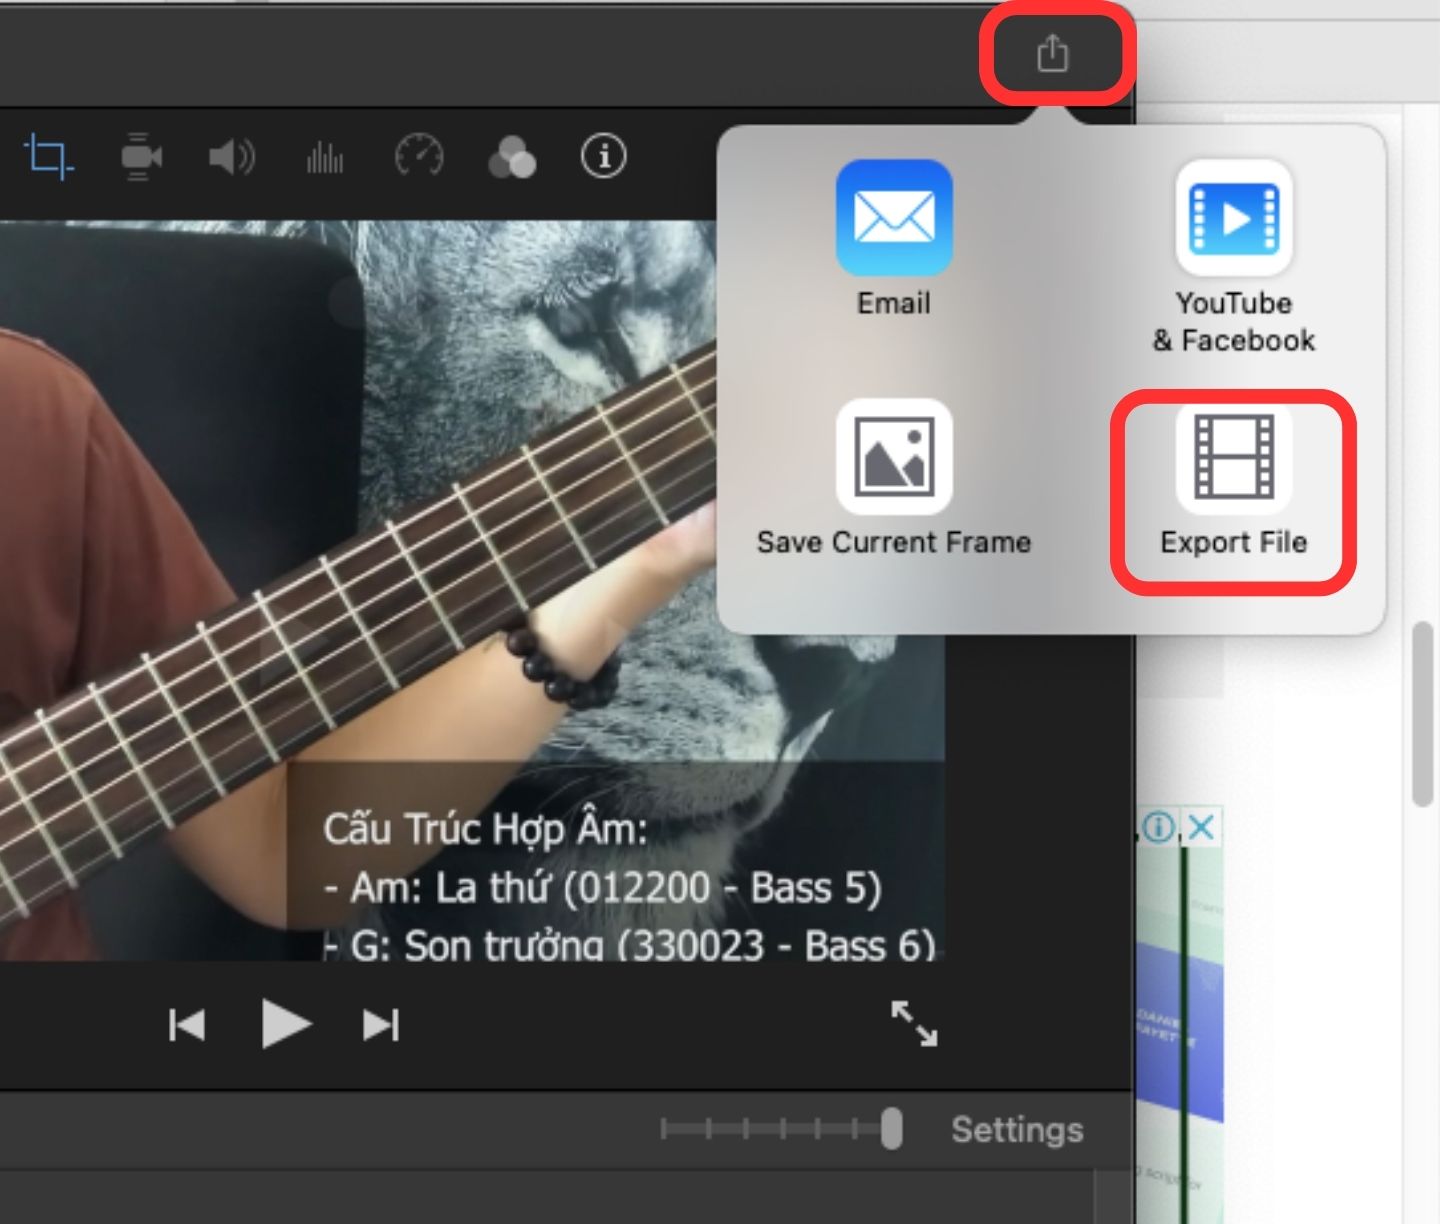
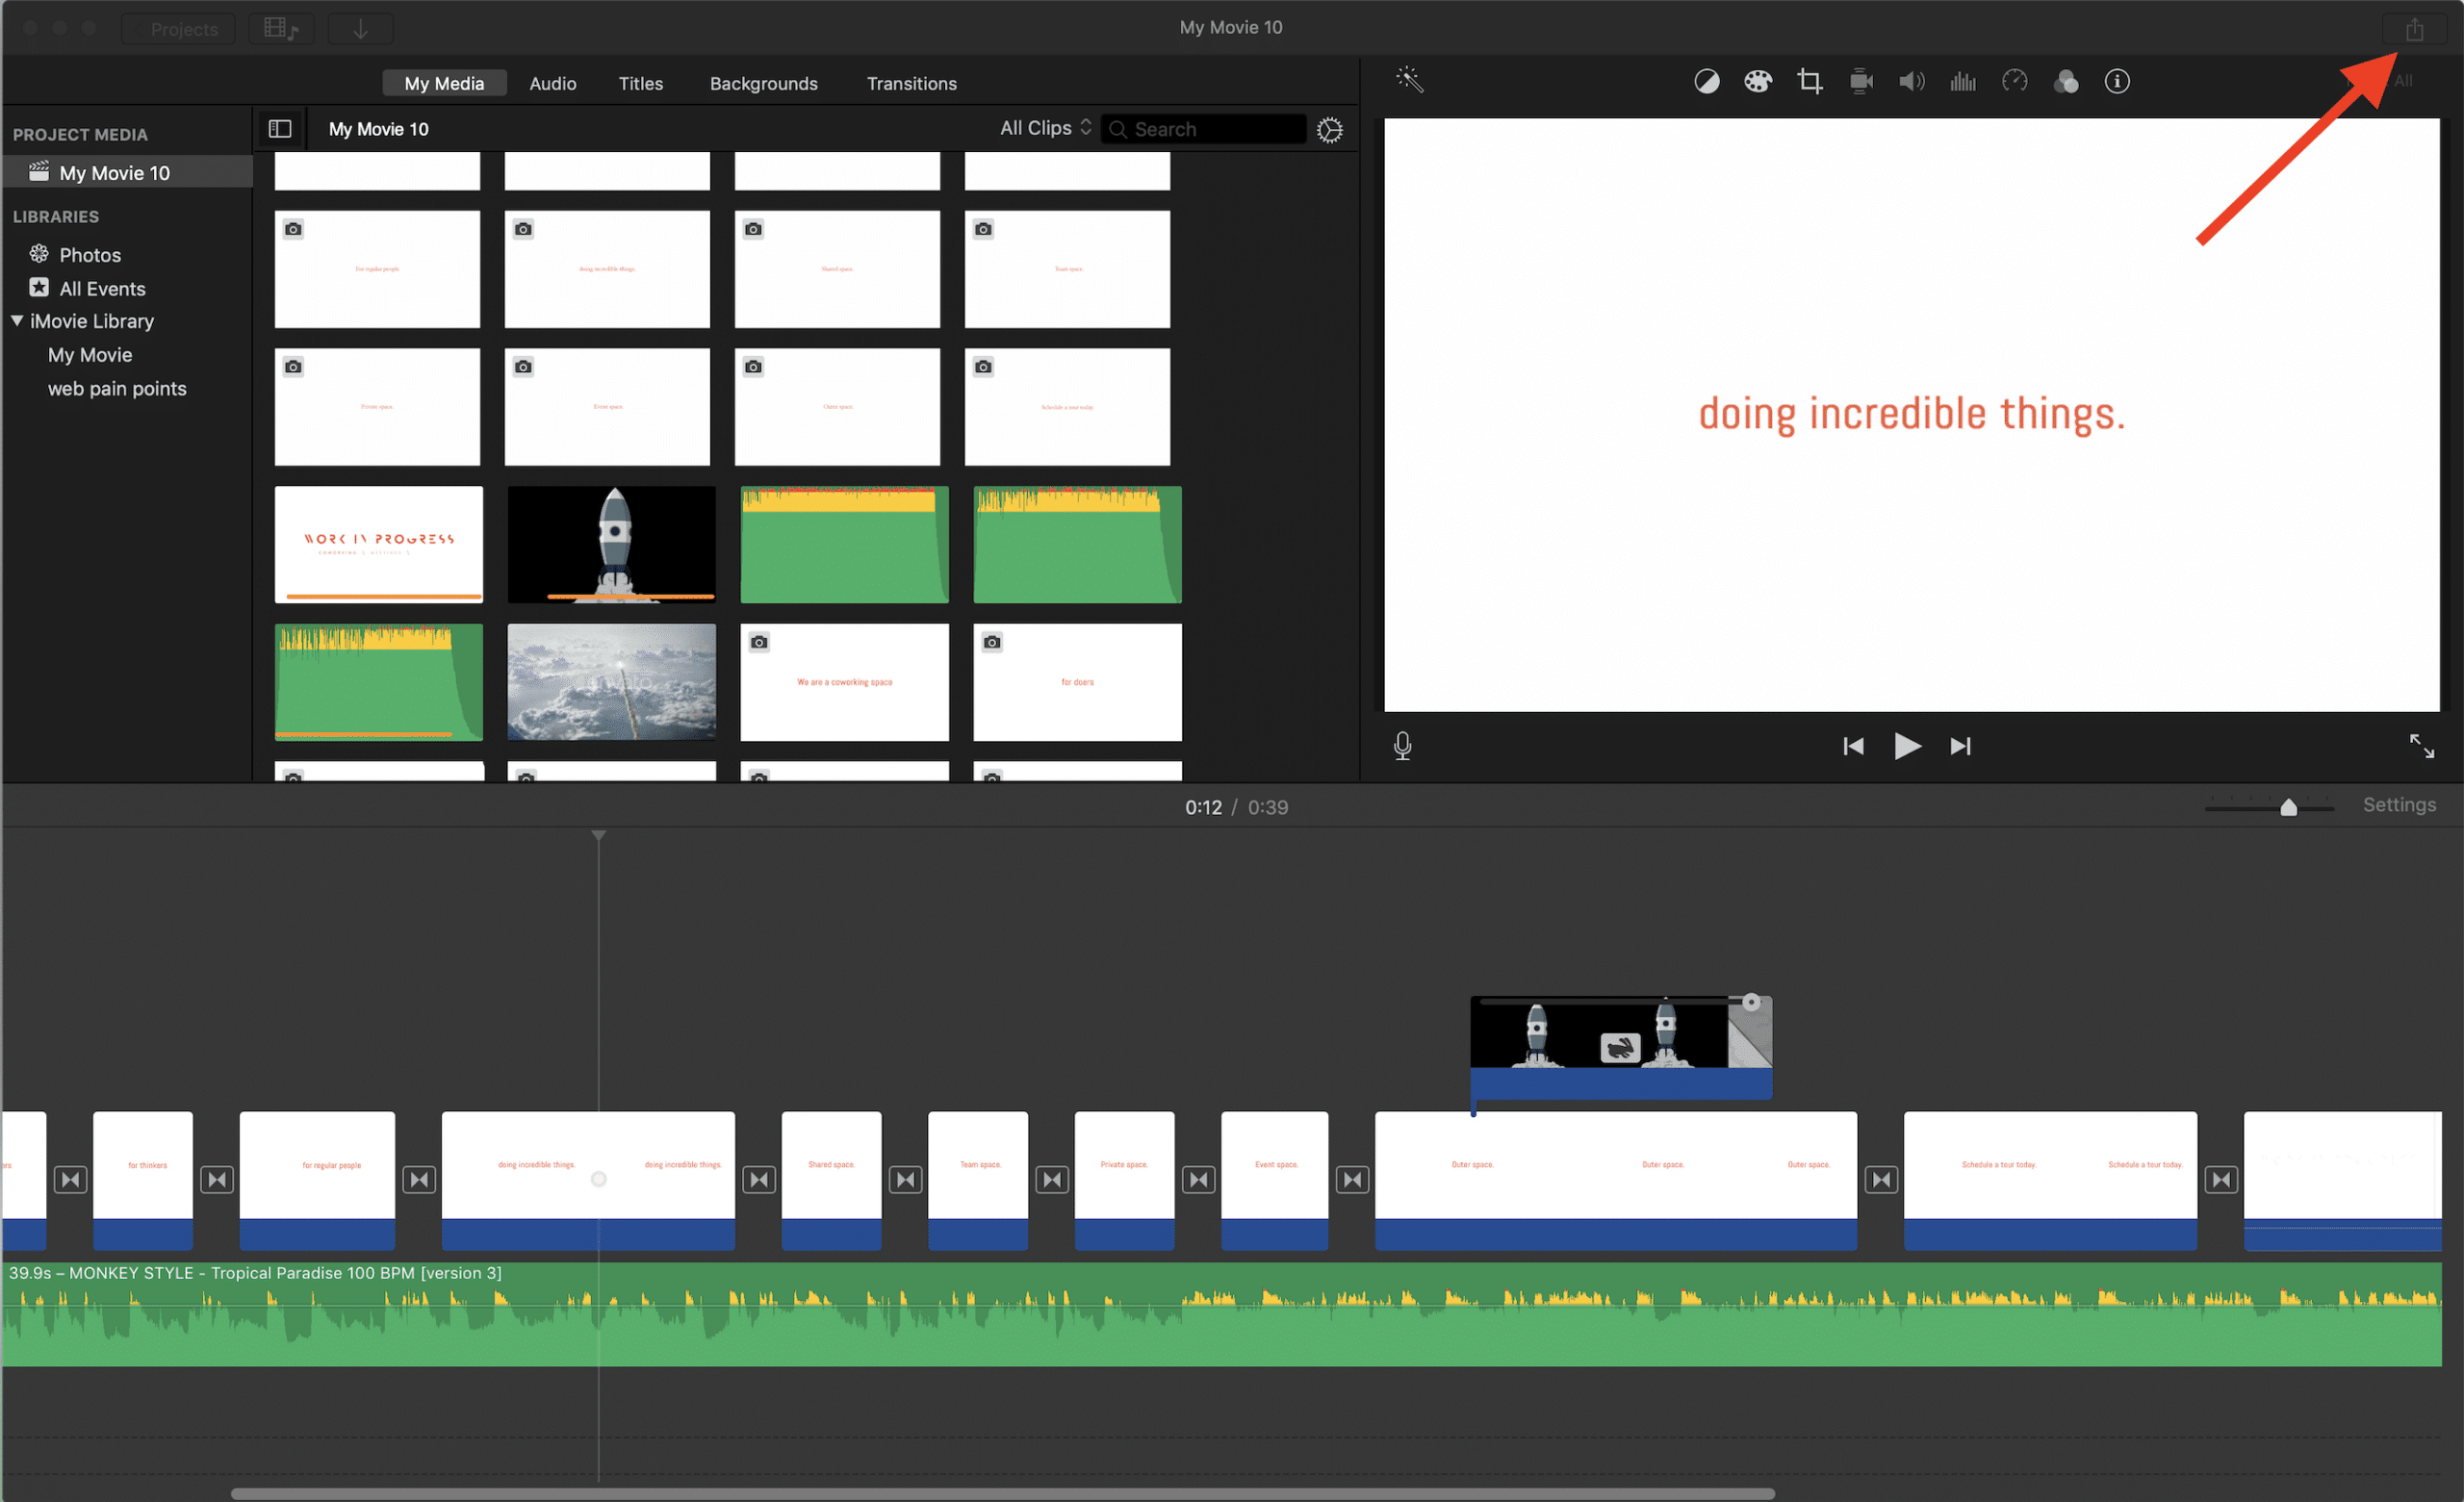
- Open your project in iMovie.
- Click on the "Share" button in the top menu.
- Select "File" from the dropdown menu.
- Choose the resolution and quality settings that best suit your needs. For most purposes, 1080p HD is a great choice.
3. Save Your MP4 File
Once you’ve chosen your settings, it’s time to save your MP4 file. Here’s how:
- Name your file something descriptive so you can easily find it later.
- Select the location where you want to save your file.
- Click "Export" and let iMovie do its thing. Depending on the length and complexity of your video, this might take a few minutes.
Common Issues When Exporting iMovie to MP4
As with anything in life, things don’t always go smoothly. Here are some common issues you might encounter when exporting iMovie to MP4 and how to fix them.
1. Export Takes Too Long
If your export process is taking forever, there are a few things you can try:
- Lower the resolution or quality settings.
- Close any unnecessary apps to free up system resources.
- Restart your computer and try again.
2. Video Quality Isn’t as Expected
Got a video that doesn’t look as sharp as you hoped? Here’s what you can do:
- Check your export settings and make sure you’ve chosen the right resolution and quality.
- Try exporting again with higher settings.
- Ensure your original footage is high quality.
Tips for Perfect iMovie to MP4 Export
Want to take your iMovie to MP4 export game to the next level? Here are some pro tips to help you out:
1. Use the Right Equipment
Make sure your computer has enough power to handle the export process. A fast processor and plenty of RAM will make a big difference.
2. Optimize Your Footage
Before you start editing, make sure your footage is optimized for iMovie. This means using the right file formats and resolutions.
3. Test Different Settings
Don’t be afraid to experiment with different export settings to find what works best for your project.
Advanced Techniques for iMovie Export to MP4
Ready to level up your skills? Here are some advanced techniques to help you master iMovie export to MP4:
1. Batch Exporting
If you have multiple projects to export, consider using batch exporting. This will save you time and effort in the long run.
2. Customizing Export Presets
Create custom export presets to save your favorite settings and use them again and again.
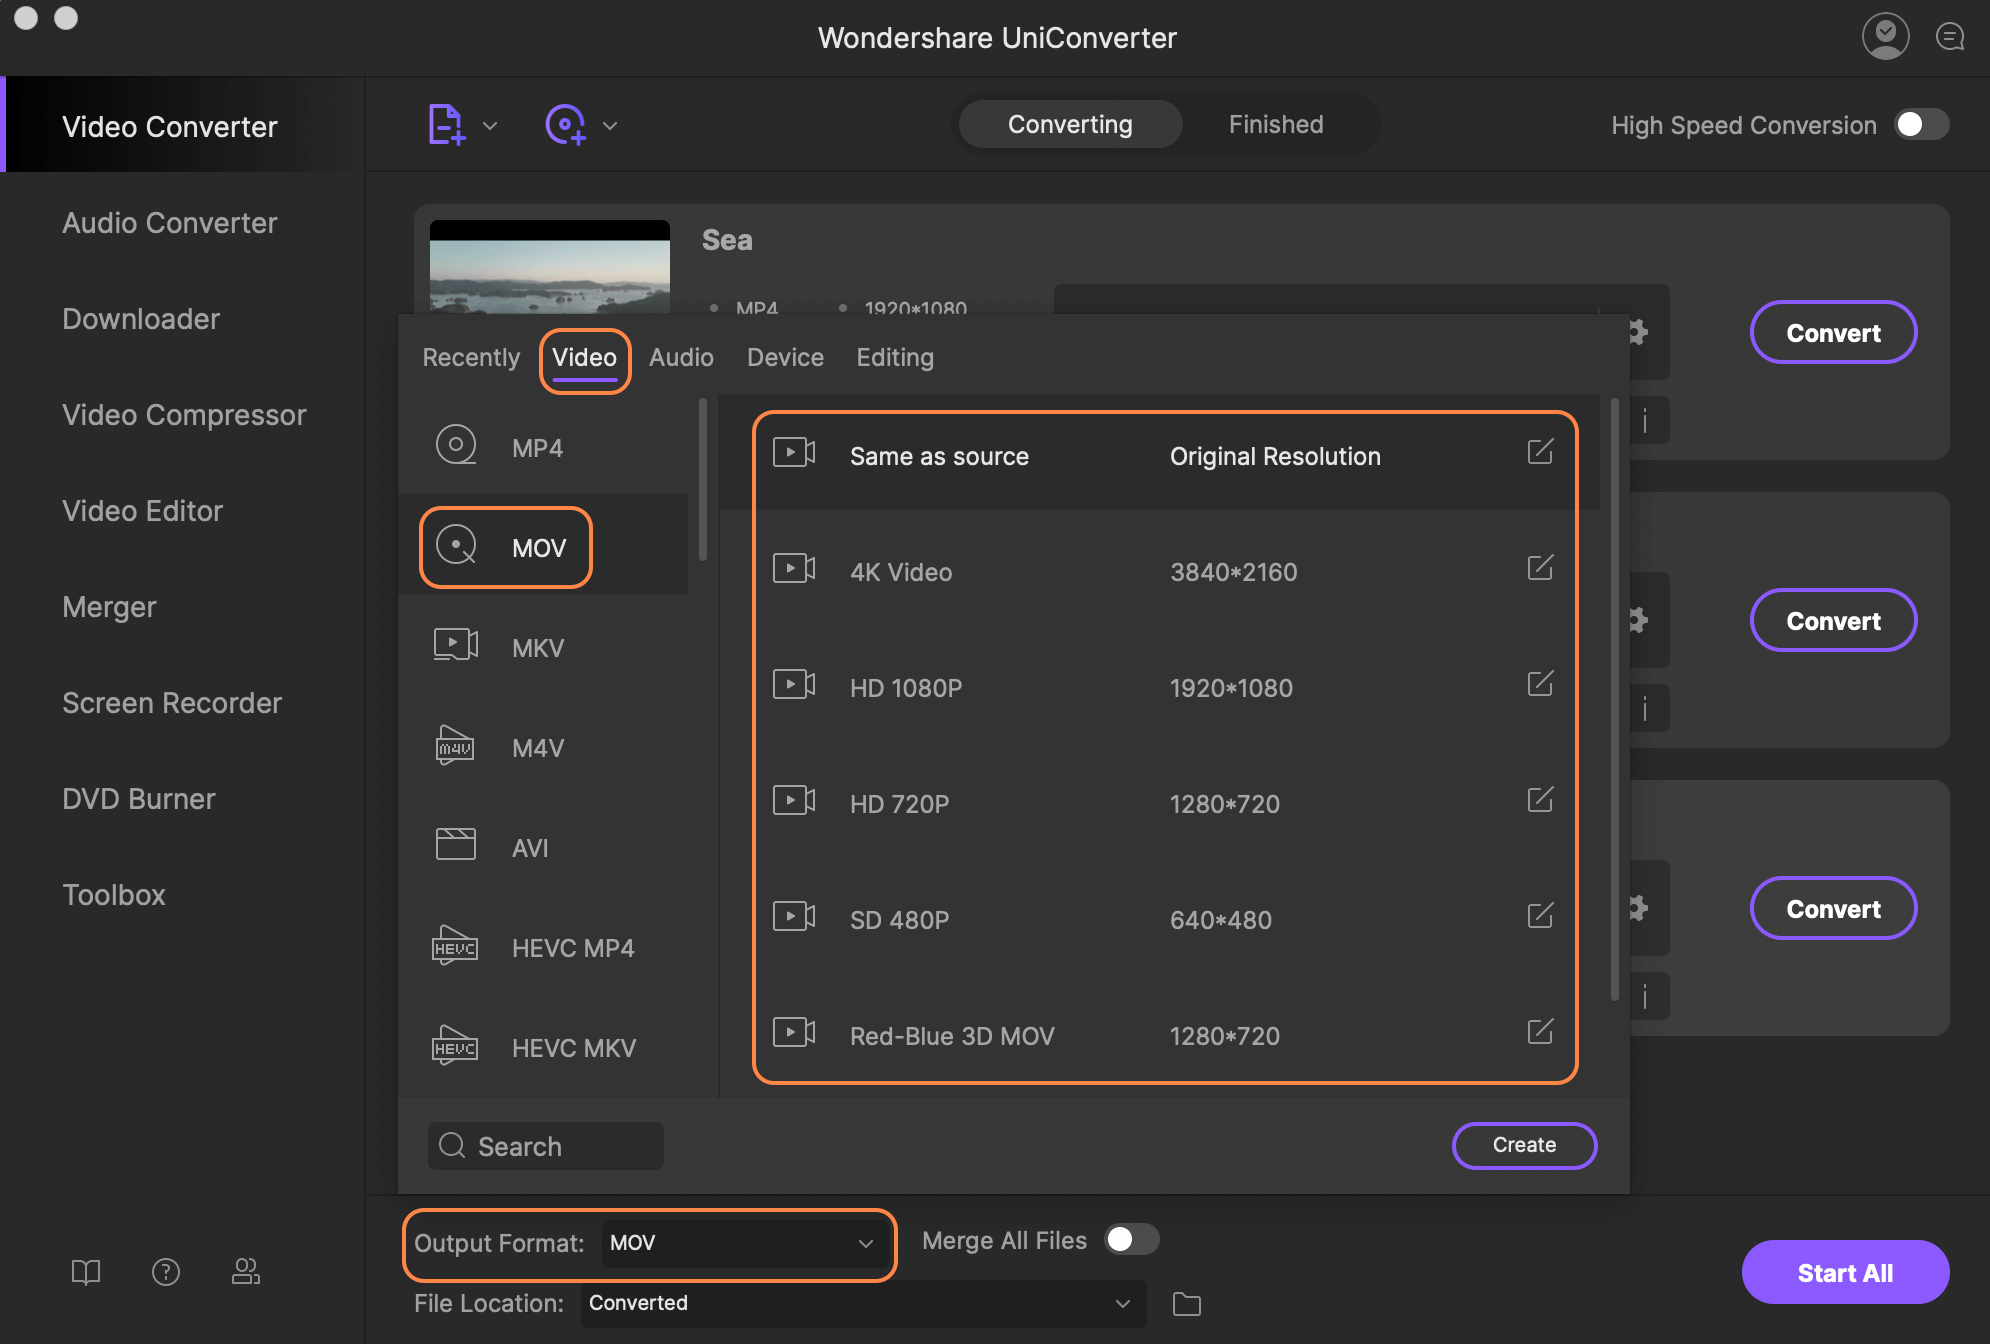
3. Using Third-Party Tools
Sometimes, iMovie’s built-in export options just don’t cut it. In those cases, consider using third-party tools like HandBrake or Final Cut Pro for more advanced exporting options.
Understanding File Sizes and Compression
When you export a video, file size and compression are two important factors to consider. Here’s what you need to know:
1. File Size Matters
Large file sizes can be a pain, especially if you’re sharing your video online or via email. Use compression to keep your file sizes manageable without sacrificing too much quality.
2. Balancing Quality and Size
Finding the right balance between quality and file size can be tricky. Experiment with different settings to find what works best for your needs.
Sharing Your MP4 Files
Once you’ve exported your iMovie project to MP4, it’s time to share it with the world. Here are some popular platforms where you can upload and share your videos:
- YouTube
- Vimeo
- TikTok
Conclusion: Take Action and Share Your Creations
There you have it—the ultimate guide to exporting iMovie to MP4. With these steps and tips, you’re ready to take your video editing skills to the next level. So, what are you waiting for? Export your masterpiece, share it with the world, and let us know how it goes. And if you have any questions or need further help, feel free to drop a comment below. Happy editing!
Table of Contents
- Why MP4 Is the King of Video Formats
- Step-by-Step Guide to Exporting iMovie to MP4
- Common Issues When Exporting iMovie to MP4
- Tips for Perfect iMovie to MP4 Export
- Advanced Techniques for iMovie Export to MP4
- Understanding File Sizes and Compression
- Sharing Your MP4 Files
- A J Simpson The Untold Story Of A Modern Phenomenon
- Marc Rudolph The Life And Legacy Of Richard Rudolphs Son
How to export a video on iMovie on Mac and iOS Android Authority
How to export an imovie as mp4 kseski
How to Export iMovie File to iPhone · Kenny Eliason
