How To Convert IMovie To MP4: A Beginner's Guide That’s As Easy As Pie
Have you ever found yourself stuck trying to figure out how to convert iMovie to MP4? Well, you're not alone. Many people use iMovie for editing videos but run into trouble when they need to export their creations in a universally compatible format like MP4. Let’s dive into this topic because converting iMovie projects to MP4 doesn’t have to be rocket science!
Let’s face it, iMovie is one of the most popular video editing tools out there, especially for Mac users. It’s user-friendly, packed with features, and makes it super easy to create professional-looking videos. But sometimes, exporting your masterpiece in the right format can feel like a headache. That’s where MP4 comes in—it’s like the golden standard of video formats, working on almost every device under the sun.
Now, if you're scratching your head wondering why you should bother converting your iMovie project to MP4, let me break it down for you. MP4 is widely supported, has excellent compression, and retains good quality. Whether you’re sharing your video online, sending it to a friend, or uploading it to YouTube, MP4 is the way to go. So, buckle up because we’re about to unravel the mystery of iMovie to MP4 conversion!
- Andrew Zimmern Divorce The Untold Story Behind The Split
- Debra Lin The Inspiring Journey Of A True Changemaker
What is iMovie and Why Should You Care?
iMovie isn’t just another app on your Mac—it’s a powerhouse for creating stunning videos. Developed by Apple, iMovie lets you edit clips, add music, transitions, and effects, all with a simple drag-and-drop interface. But here’s the thing—when you finish your project, the default export format might not always be what you need. That’s where the magic of converting iMovie to MP4 comes in.
Why does this matter? Well, think about it. You’ve spent hours perfecting your video, and now you want to share it with the world. But if the format isn’t compatible with the platform you’re using, all that hard work could go to waste. MP4 solves this problem by being universally accepted across devices and platforms. So, whether you’re sharing your video on social media, emailing it, or uploading it to YouTube, MP4 has got your back.
Why MP4 is the Format of Choice
- MP4 is highly compatible with almost every device and platform.
- It offers great compression without sacrificing too much quality.
- MP4 files are smaller in size, making them easier to share and upload.
- Most video players and streaming services support MP4.
See? MP4 isn’t just a fancy format—it’s practical, efficient, and downright awesome. So, if you’re wondering how to convert iMovie to MP4, you’re on the right track. Let’s keep rolling!
- Salena Vargas The Rising Star Shining Bright In The Entertainment World
- The Darkest Person Ever Exploring The Depths Of Human Darkness
Why Convert iMovie to MP4: The Big Picture
Now that we’ve established why MP4 is the go-to format, let’s talk about why converting iMovie to MP4 is such a big deal. Imagine this—you’ve created an incredible video using iMovie, and you’re ready to upload it to YouTube. But wait, the default export format isn’t supported by YouTube. Bummer, right? This is where converting to MP4 saves the day.
Here’s another scenario. Let’s say you want to send your video to a friend via email. Most email providers have size limits, and if your video file is too large, it might not send properly. By converting to MP4, you can reduce the file size while maintaining good quality, making it easier to share.
Let’s not forget about social media platforms like Instagram, Facebook, or TikTok. These platforms often require specific video formats, and MP4 is usually one of them. So, converting your iMovie project to MP4 ensures that your video looks great no matter where you share it.
Common Reasons to Convert iMovie to MP4
- Sharing videos on social media platforms.
- Uploading videos to YouTube or other video-sharing sites.
- Sending videos via email or messaging apps.
- Ensuring compatibility with different devices and players.
See? Converting iMovie to MP4 isn’t just about technicalities—it’s about making sure your video reaches its audience without any hiccups. Now that we’ve covered the why, let’s move on to the how!
Step-by-Step Guide: How to Convert iMovie to MP4
Alright, here’s the part you’ve been waiting for—a step-by-step guide on how to convert iMovie to MP4. Don’t worry; it’s easier than you think. Just follow these simple steps, and you’ll be exporting your videos in MP4 format in no time.
Method 1: Using iMovie’s Built-in Export Options
iMovie actually has a built-in feature that allows you to export your videos directly in MP4 format. Here’s how you do it:
- Open your iMovie project.
- Click on the "Share" button at the top menu.
- Select "File" from the dropdown menu.
- Choose the desired resolution (720p, 1080p, etc.).
- Make sure the format is set to MP4.
- Click "Next" and save your file to your desired location.
Voila! You’ve just exported your iMovie project as an MP4 file. Easy peasy, right?
Method 2: Using Third-Party Conversion Tools
If for some reason iMovie’s built-in export options don’t work for you, you can always use third-party conversion tools. There are plenty of reliable software options available that can help you convert iMovie files to MP4. Here’s a quick rundown:
- Handbrake: A free and open-source tool that’s great for converting videos to MP4.
- Pavtube Video Converter: A powerful tool that supports a wide range of formats, including MP4.
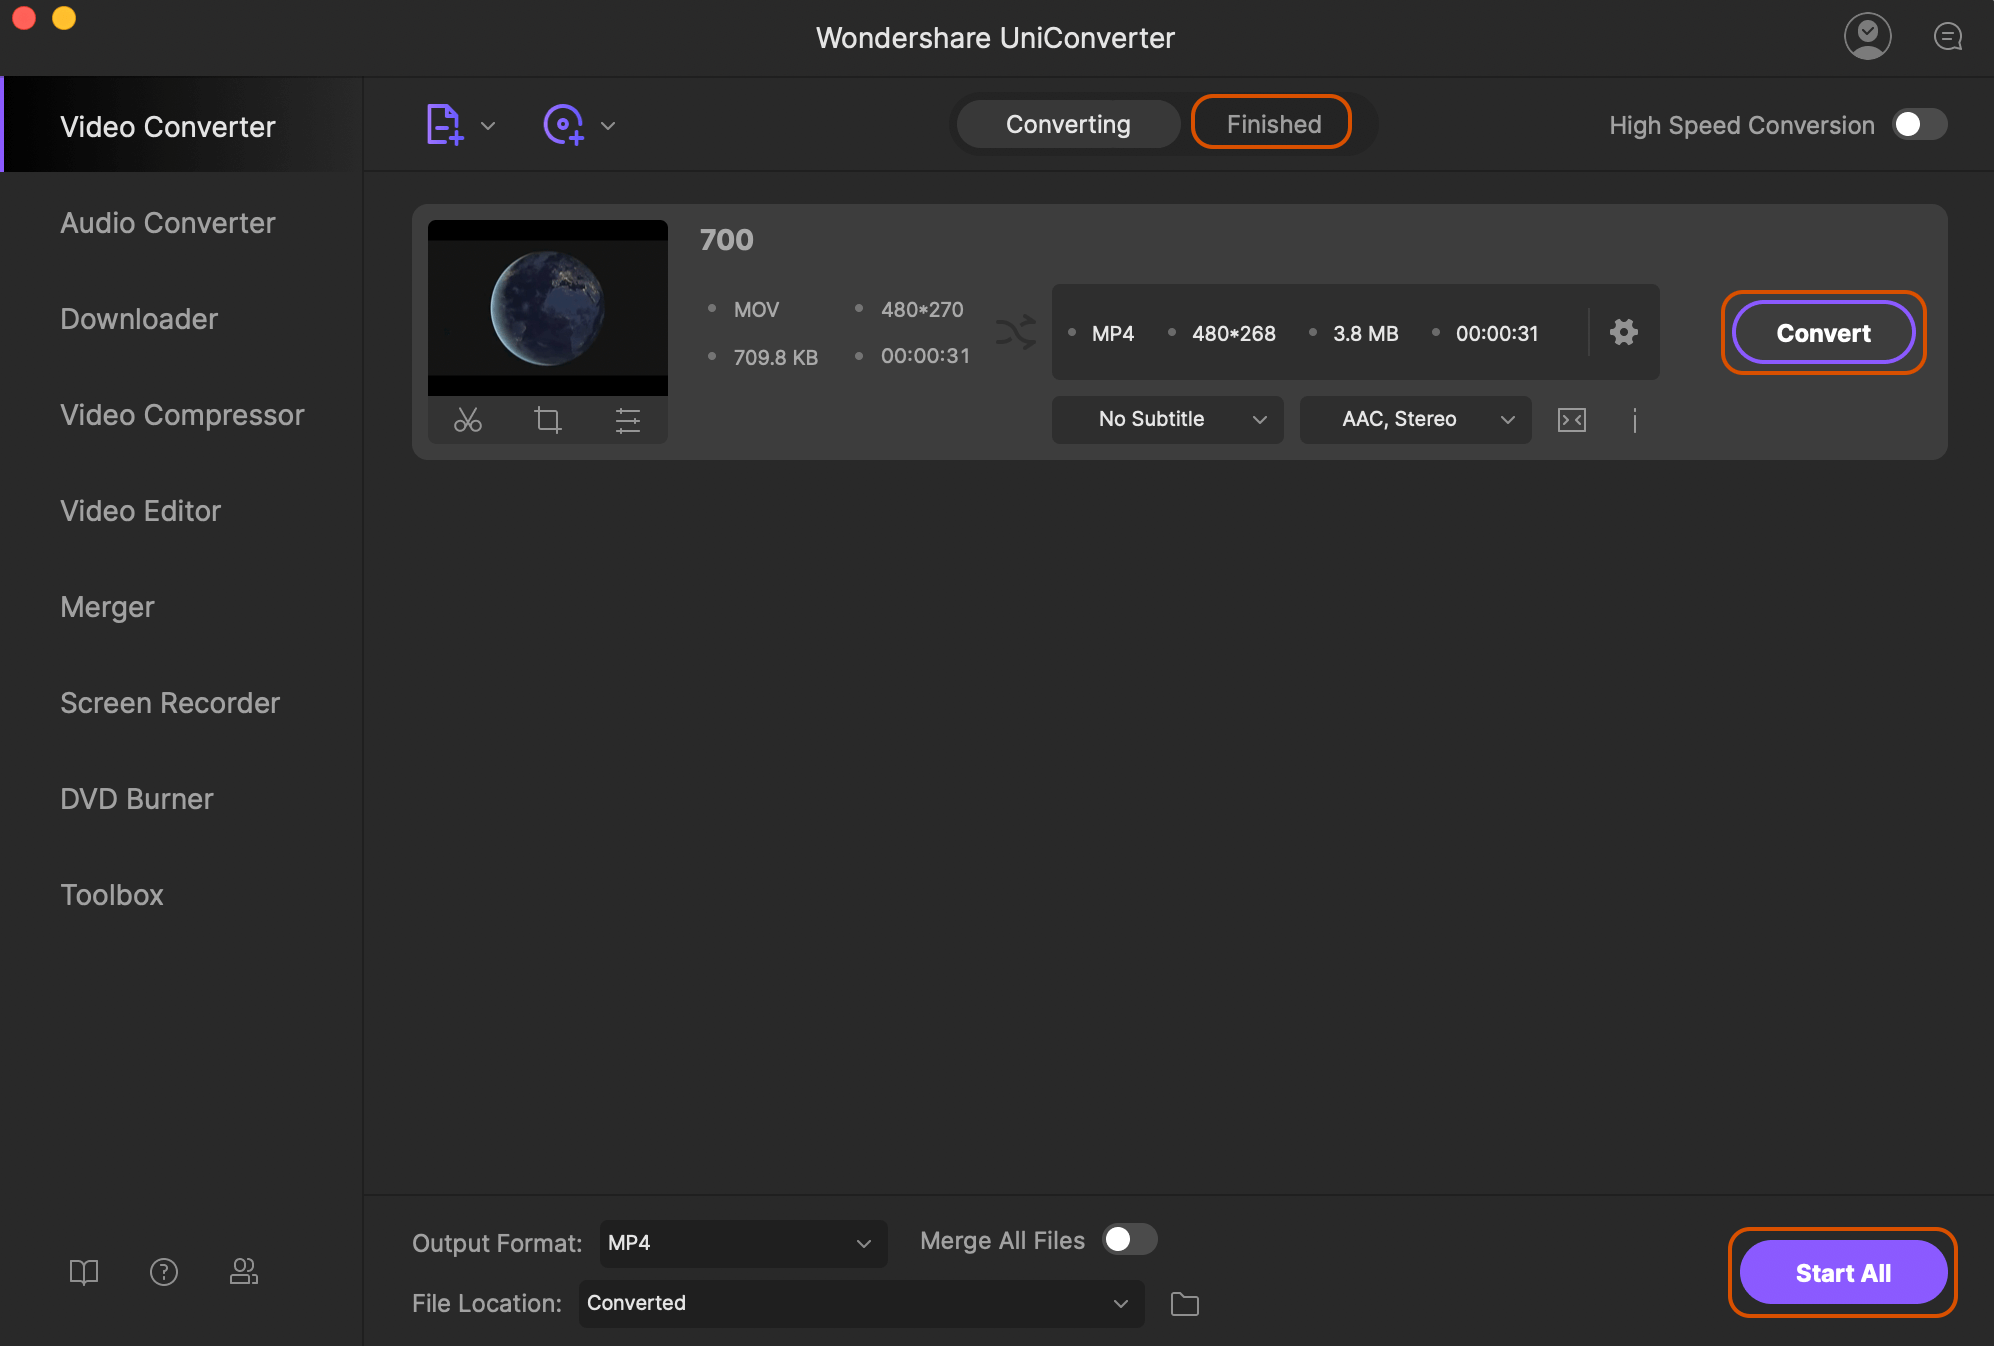
- Wondershare UniConverter: A comprehensive tool that offers more than just video conversion.
Just download and install your preferred tool, follow the instructions, and you’ll have your MP4 file ready in no time.
Tips and Tricks for Perfect Conversion
Now that you know how to convert iMovie to MP4, here are a few tips and tricks to ensure your conversion process goes smoothly:
- Choose the Right Resolution: Depending on where you plan to share your video, choose the appropriate resolution (720p for standard HD, 1080p for full HD, etc.).
- Adjust Video Settings: Play around with the video settings like frame rate and bitrate to optimize the file size and quality.
- Use Compression Wisely: While compression can reduce file size, be careful not to overdo it, as it might affect video quality.
- Preview Before Exporting: Always preview your video before exporting to ensure everything looks good.
These little tips can make a big difference in the quality of your exported MP4 file. So, don’t skip them!
Common Issues and How to Fix Them
Even with the best tools and methods, sometimes things can go wrong. Here are some common issues you might encounter when converting iMovie to MP4, along with their solutions:
Issue 1: Export Takes Too Long
If your export process is taking forever, it could be due to a large file size or high resolution. Try reducing the resolution or adjusting the video settings to speed things up.
Issue 2: Video Quality is Poor
If the quality of your exported MP4 file is not up to par, check your export settings. Make sure you’re using the right resolution and bitrate for your video.
Issue 3: File Won’t Play
If your MP4 file won’t play on certain devices, it could be due to codec incompatibility. Try using a different conversion tool or adjusting the export settings.
By addressing these issues early on, you can avoid frustration and ensure a smooth conversion process.
Understanding MP4 Codec Options
When you’re exporting your iMovie project to MP4, you’ll encounter something called codecs. A codec is basically a method of encoding or compressing your video. Here are some common MP4 codecs you should know about:
- H.264: The most widely used codec, offering excellent compression and quality.
- H.265 (HEVC): A newer codec that offers better compression than H.264 but may not be supported by all devices.
- MPEG-4 Part 2: An older codec that’s still used in some cases but not as efficient as H.264.
Choosing the right codec can make a big difference in the quality and compatibility of your MP4 file. So, do your research and pick the one that best suits your needs.
Best Practices for iMovie Editing
Before you even think about converting your iMovie project to MP4, it’s important to follow some best practices for editing. Here are a few tips to help you create the best possible video:
- Organize Your Clips: Keep your clips organized in folders to make editing easier.
- Use Transitions Wisely: Transitions can enhance your video, but don’t overdo it.
- Add Music and Sound Effects: Music and sound effects can add depth to your video, but make sure they’re not too loud.
- Review and Revise: Always review your video and make revisions as needed before exporting.
By following these best practices, you’ll create a video that’s not only visually appealing but also technically sound.
Final Thoughts: Your Call to Action
And there you have it—a comprehensive guide on how to convert iMovie to MP4. Whether you’re using iMovie’s built-in export options or third-party tools, converting your video to MP4 is a straightforward process that can make a huge difference in how your video is received.
So, what are you waiting for? Go ahead and try it out! Once you’ve successfully converted your iMovie project to MP4, share it with the world. And don’t forget to leave a comment below letting us know how it went. Your feedback helps us improve and create even better content for you.
Until next time, happy editing and keep those creative juices flowing!
- The Blackest Man A Journey Into The Darkest Complexions And Their Stories
- What Happened To Bill Belichicks First Wife The Untold Story You Need To Know
How to Convert 4K Video to Any Other Formats wikigain
How to Convert iMovie to MP4 on Mac iMovie to MP4 Converter

MP4 to MOV converter Convert MP4 to MOV online free
